HOW TO
Cómo: Configure su refrigerador líquido de CPU en iCUE 4 o posterior
iCUE version 4 has an updated user interface for an improved user experience. We have a video and guide to help you set up your liquid CPU cooler in the new UI.
Video instructions
Creating new lighting effects
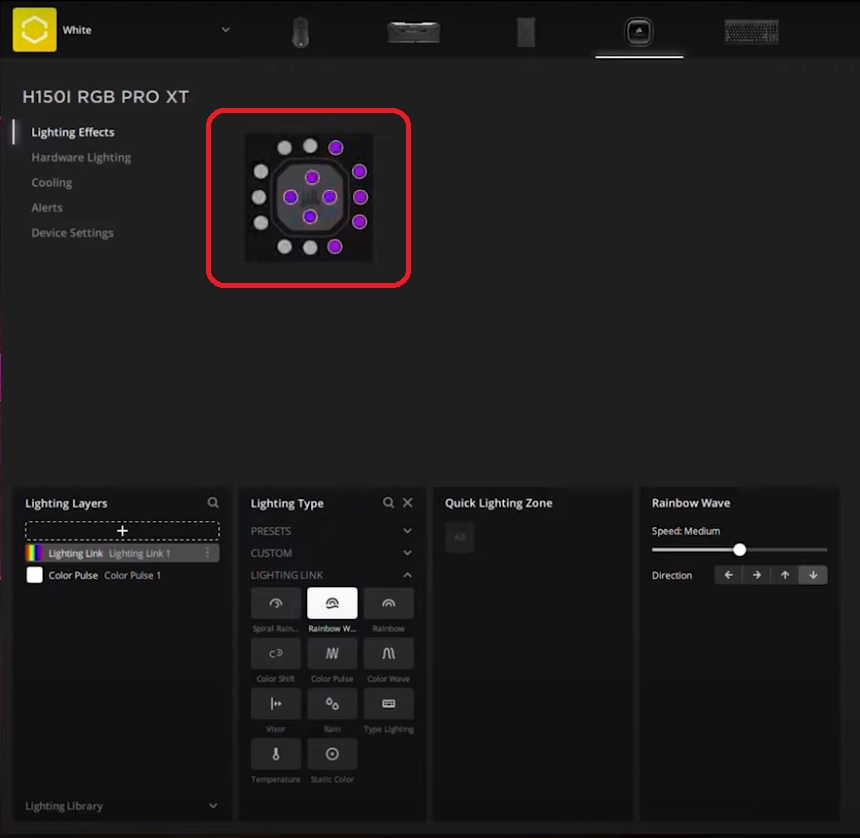
You can use iCUE create new lighting effects for your liquid CPU cooler. For further customization, you can create multiple layers to create more unique lighting effects.
To create a lighting effect:
- Select your liquid CPU cooler in iCUE.
- Click Lighting Effects in the left menu.
- Click the + button in the Lighting Layers window.
- Select a lighting effect in the Lighting Type window.
- NOTE: If you select a Lighting Link effect, the effect will be applied to all iCUE-compatible devices currently connected to your PC system.
- Customize your lighting effect.
- Apply the lighting effect to the lighting zones by dragging and selecting the zones on the preview.
- You can also select multiple individual zones by holding the CTRL key and clicking the individual zones in the preview.

- You can also select multiple individual zones by holding the CTRL key and clicking the individual zones in the preview.
Turning off effects when iCUE is not running
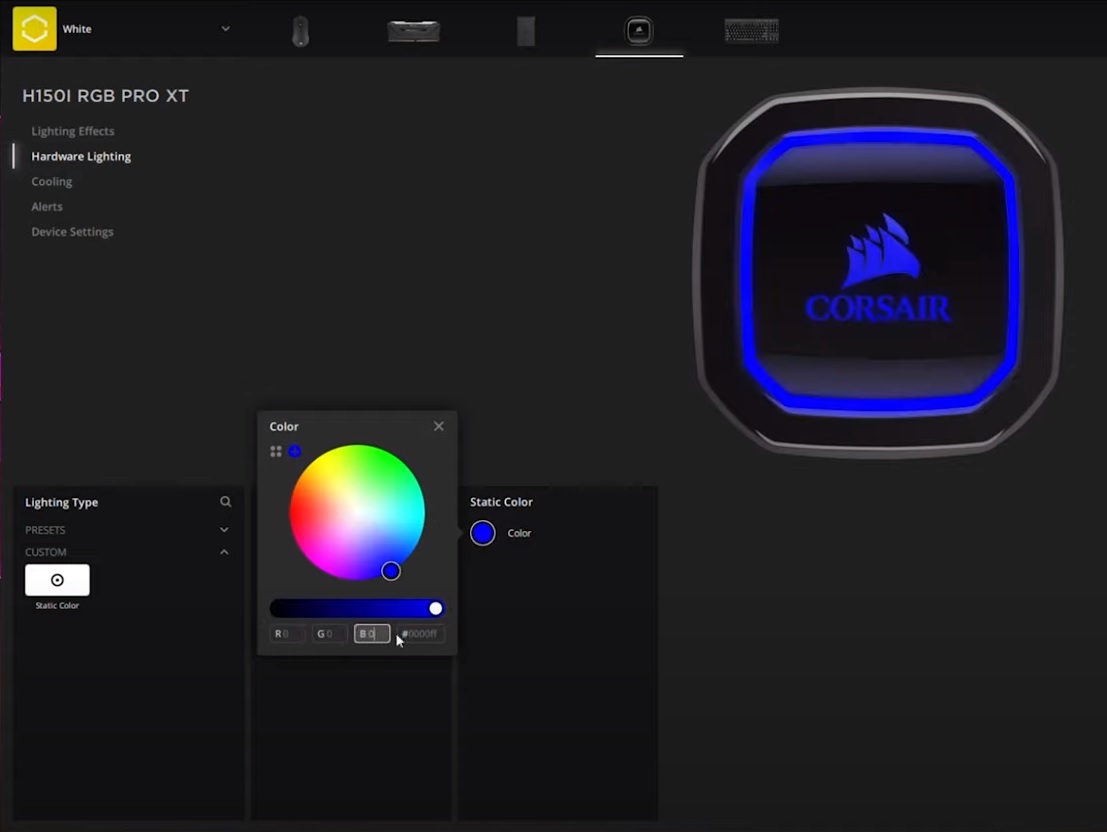
If you do not want your liquid CPU cooler to display any effects when iCUE is not running, such as when your PC goes into sleep mode, you can set a hardware lighting effect that will display a static black color when iCUE is not running.
To set up a static black lighting effect:
- Select your liquid CPU cooler in iCUE.
- Click Hardware Lighting in the left menu.
- Select Static Color in the Lighting Type window.
- Set the RGB values to 0.

Creating your own custom cooling presets
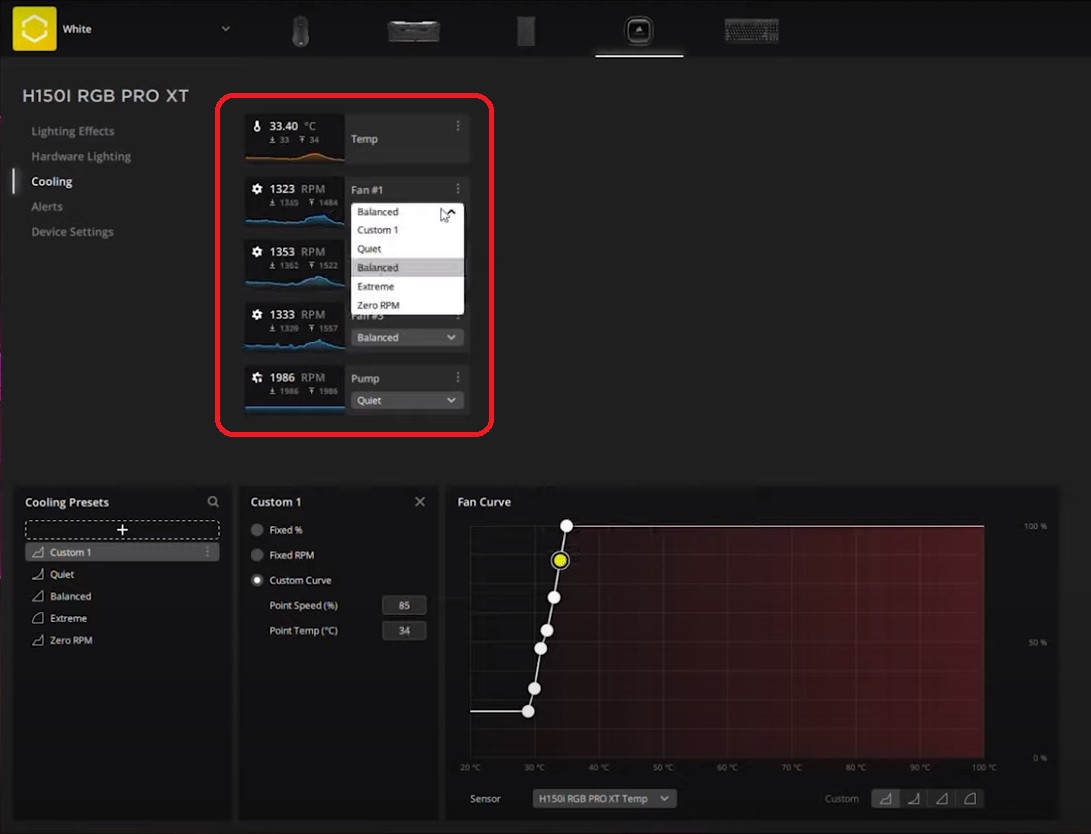
Liquid CPU coolers have four presets to select from: Quiet, Balanced, Extreme, and Zero RPM. You can also create your own preset to fit your specific needs.
To create a cooling preset:
- Select your liquid CPU cooler in iCUE.
- Click Cooling in the left menu.
- Click the + button in the Cooling Presets window.
- Select whether you want your preset to be Fixed %, Fixed RPM, or have a Custom Curve.
- Customize your preset by:
- Entering values if you selected Fixed % or Fixed RPM.
- Adjusting the curve if you selected Custom Curve.
- Select the dropdown menu of each fan or pump and select your new preset to apply it.

Setting up alerts
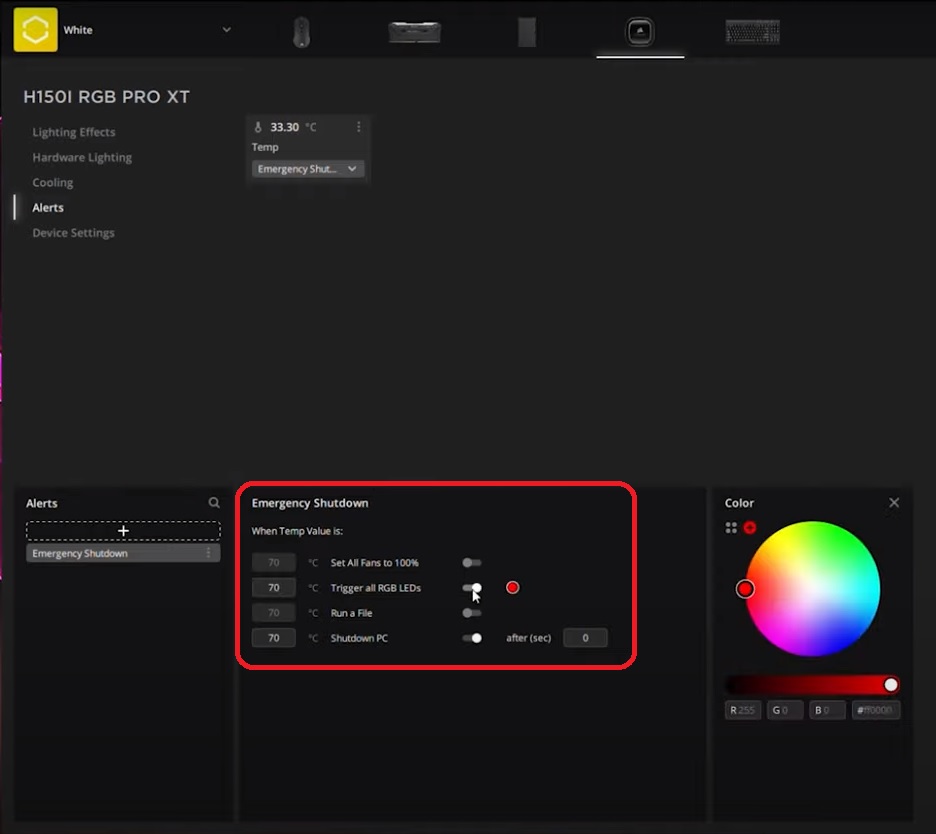
You can set iCUE to send you a notification or cause your fans to perform a specific action when a specified temperature is reached. These actions include:
- Setting all fans to 100%
- Triggering all RGB LEDs to display a specific color
- Running a file
- Performing an emergency shutdown
To set up an alert:
- Select your liquid CPU cooler in iCUE.
- Click Alerts in the left menu.
- Click the + button in the Alerts window.
- Toggle which effects you want to enable in the alert.

- Specify what temperature you want to trigger the effects.
- Select the dropdown menu on the temperature sensor and click your alert to apply it.
Updating cooler firmware
To update your liquid CPU cooler firmware, click Device Settings in the left menu. Click Check for Updates to see if a firmware update is available. If there is, iCUE will download it immediately.


