HOW TO
How to: Set up the MM700 RGB mouse pad in iCUE
Need help setting up your new MM700 RGB mouse pad? We have videos and written guides to help you out.
Please note that the instructions for iCUE version 5/4 will be different than iCUE version 3 or older due to its revamped user interface.
For iCUE version 5 and newer
Setting up lighting effects
You can set up the lighting effects of your MM700 by using the Lighting Effects tab in iCUE. Here, you can create lighting layers to give your mousepad the lighting effects you desire.
You can further customize your MM700 by creating multiple lighting layers and applying them to different lighting zones on your mousepad.
To create lighting layers:
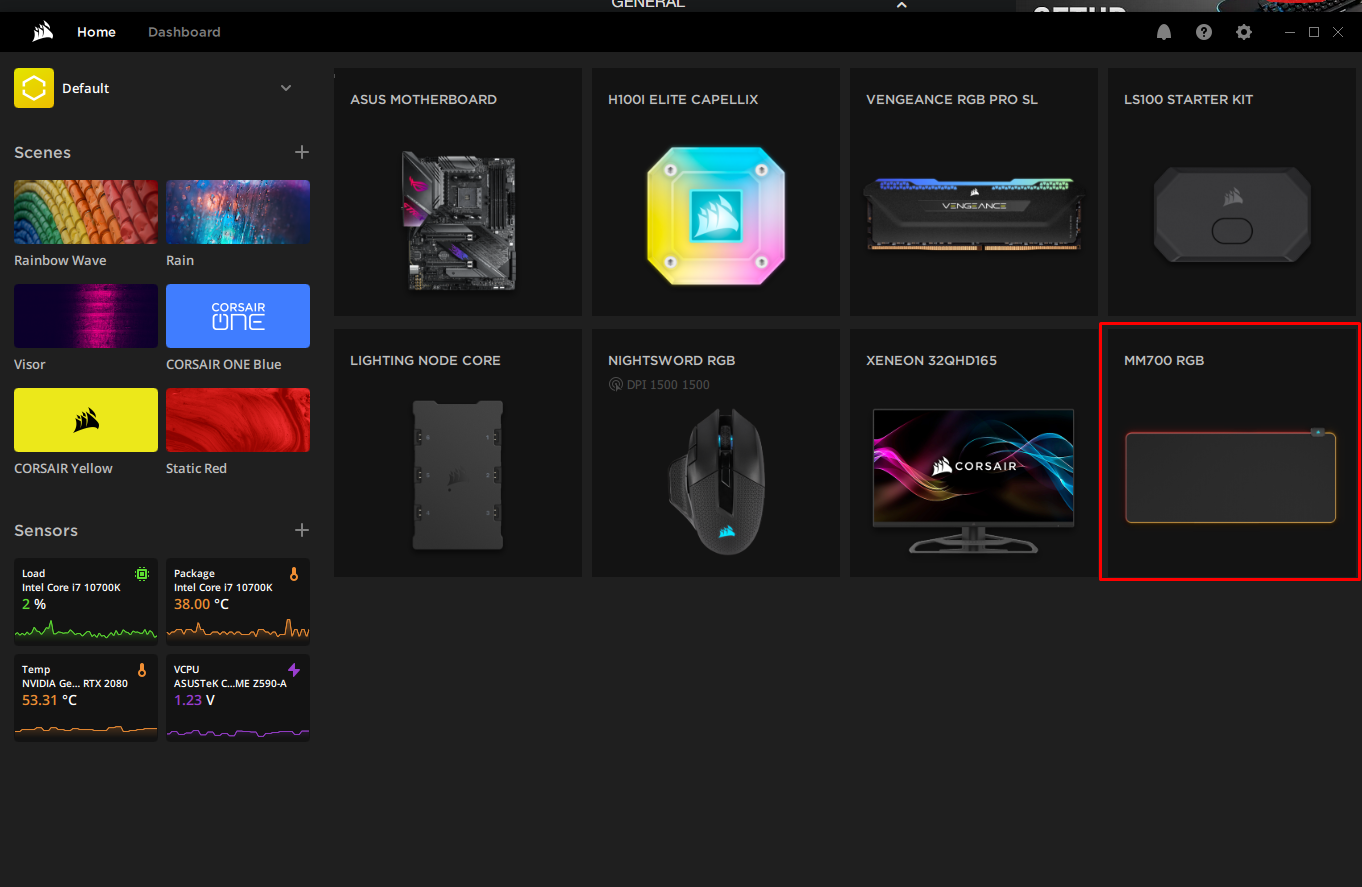
- Connect your MM700 mouse pad to your PC using the included USB-C cable.
- Open iCUE.
- Select MM700 RGB in the DEVICES section.
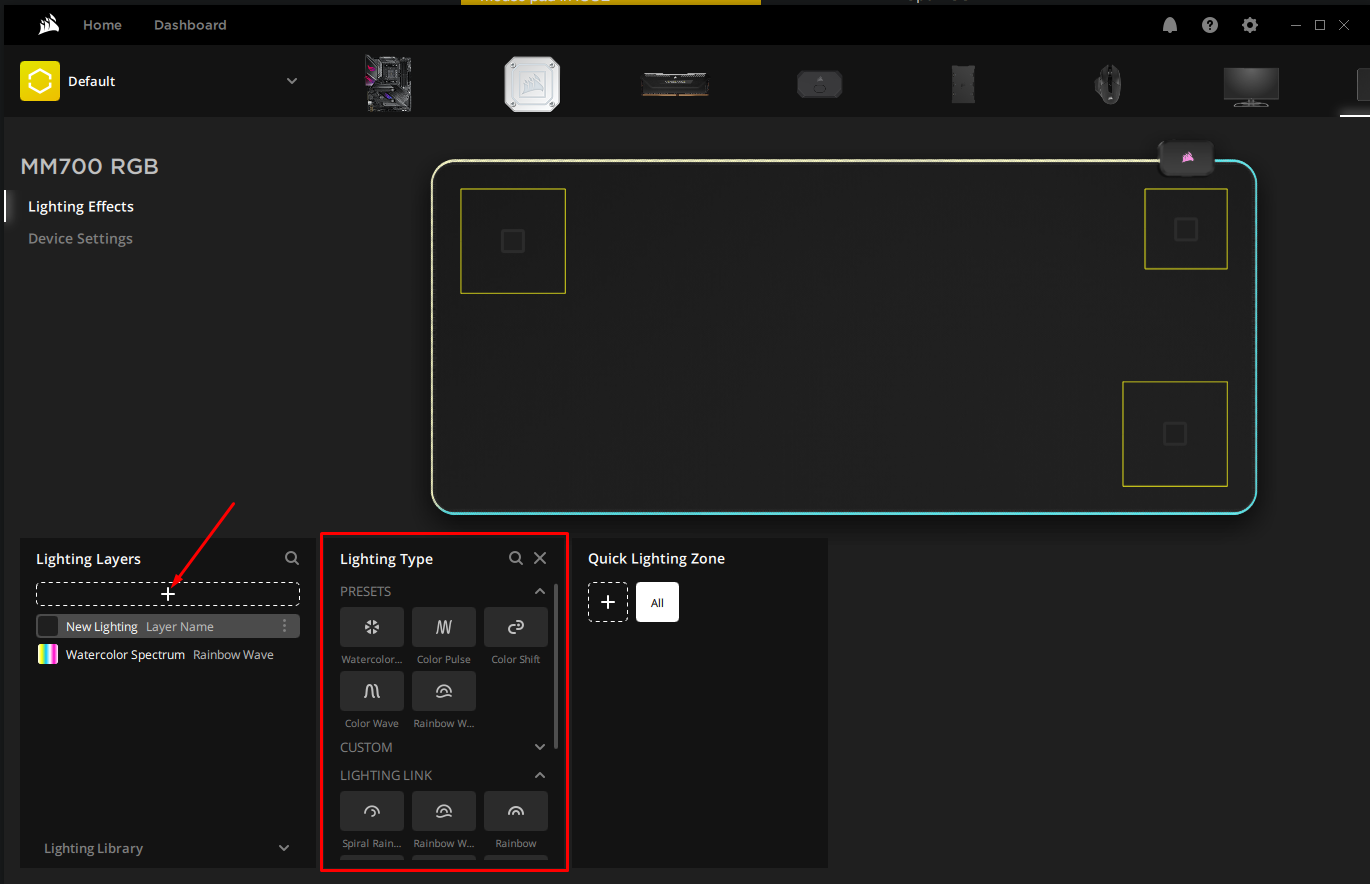
- Click Lighting Effects in the left menu.
- Click the + button in Lighting Layers.
- On the mousepad preview, select the lighting zone that you want to customize.
- For the MM700, you can customize three zones: the logo zone, the upper left zone, and the lower right zone.
- For the MM700, you can customize three zones: the logo zone, the upper left zone, and the lower right zone.
- In Lighting Type, select the lighting effect you want to apply.
- Edit the lighting effect however you wish.
Video instructions
For iCUE version 3 or older
Setting up the mouse pad
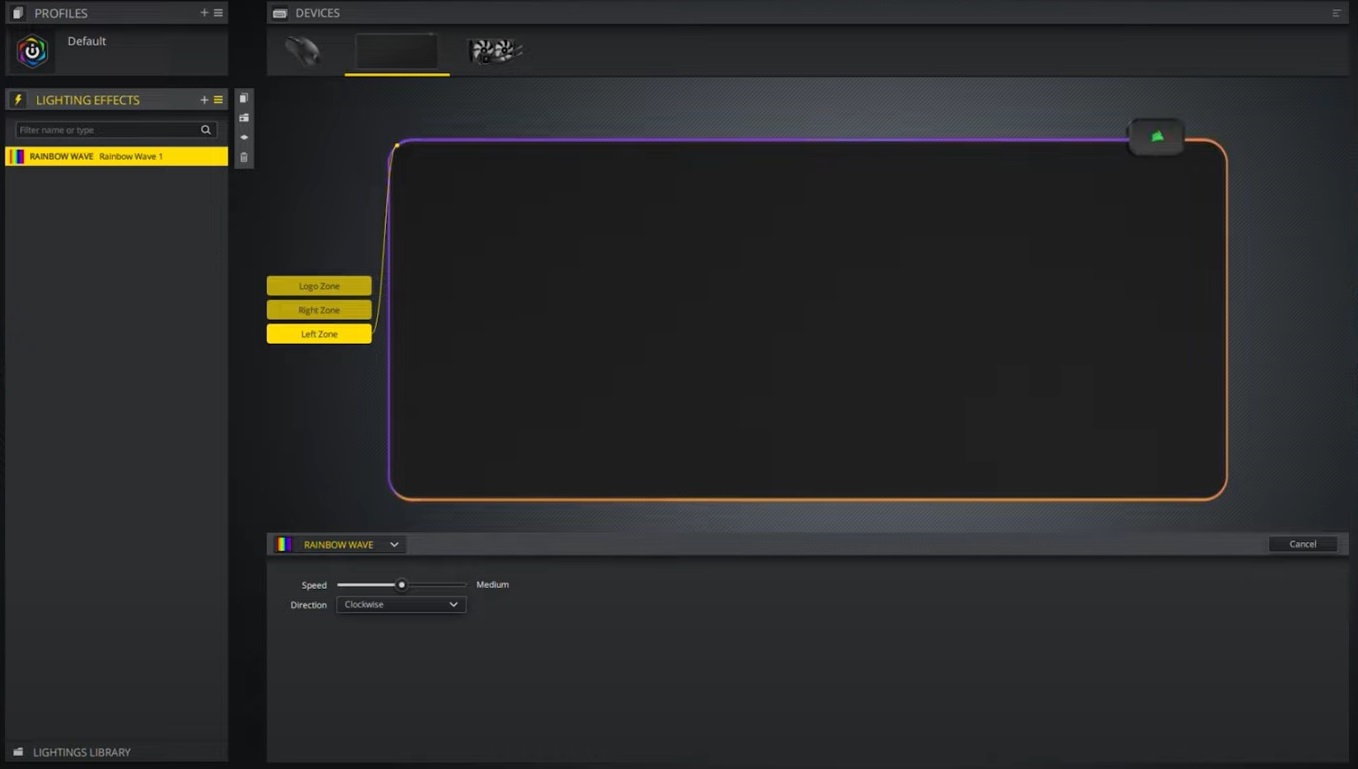
- Connect your MM700 mouse pad to your PC using the included USB-C cable.
- Open iCUE.
- Select MM700 RGB in the DEVICES section.

- Click LIGHTING EFFECTS in the left menu.
- Click the + button to add a new lighting effect for your mouse pad.
- Customize the mouse pad however you want.
Video instructions
RELATED CONTENT


