HOW TO
取り付け方法Hydro Xシリーズ XM2 M.2 SSDウォーターブロックの取り付け
The Hydro X Series XM2 M.2 SSD Water Block allows you to cool a high-speed M.2 SSD and allowing you to maintain fast data speeds. We have a video and written instructions to help with installation.
Video instructions
Installing the M.2 SSD Water Block
Before installation, make sure that your PC system is powered off.
- Remove the protective film from the thermal pads of the mounting clip and water block.
- Place your M.2 NVME SSD onto the mounting clip.

- Place the water block onto the M.2 NVME SSD and press down until the mounting clip closes.
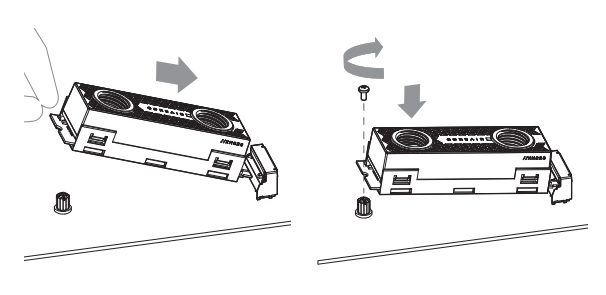
- Find an available M.2 key M 2280 slot on your motherboard.
- Make sure you remove any cover and screws; for shorter M.2 cards, ensure no screws remain on the standoffs.
- Insert the M.2 NVME SSD into the slot.
- Secure the SSD with a screw.
- Install the two XF G1/4" BSPP threaded-type fittings onto the water block ports.
- Make sure you tighten the fittings by hand. Do NOT use tools to tighten the fittings.
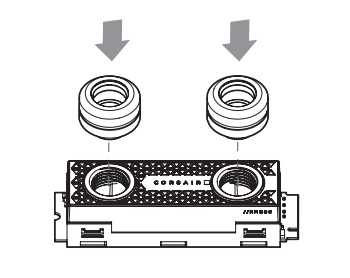
- Make sure you tighten the fittings by hand. Do NOT use tools to tighten the fittings.
- Install and secure the the water block tubing onto the fittings.
Make sure that you do a leak test before you power on your PC system.