HOW TO
How to: Install your iCUE RGB ELITE Liquid CPU cooler
This article will help you set up your ELITE series liquid CPU cooler in your PC system.
NOTE: The iCUE RGB ELITE Liquid CPU cooler comes with the Intel mounting bracket preinstalled. If you have an AMD system, you will need to swap out the bracket with an AMD-compatible mounting bracket.
Video instructions
Step one: Preparing the radiator
The first thing to do is determine the placement of your cooler's radiator in your system and the orientation of your fans. If you need help deciding how to mount your radiator, you can check out our article on ideal radiator placement.
Once you have decided how to mount your radiator and how to orientate your fans, place your fans onto the radiator and use the provided screws to secure them in place.
Step two: Preparing the pump head
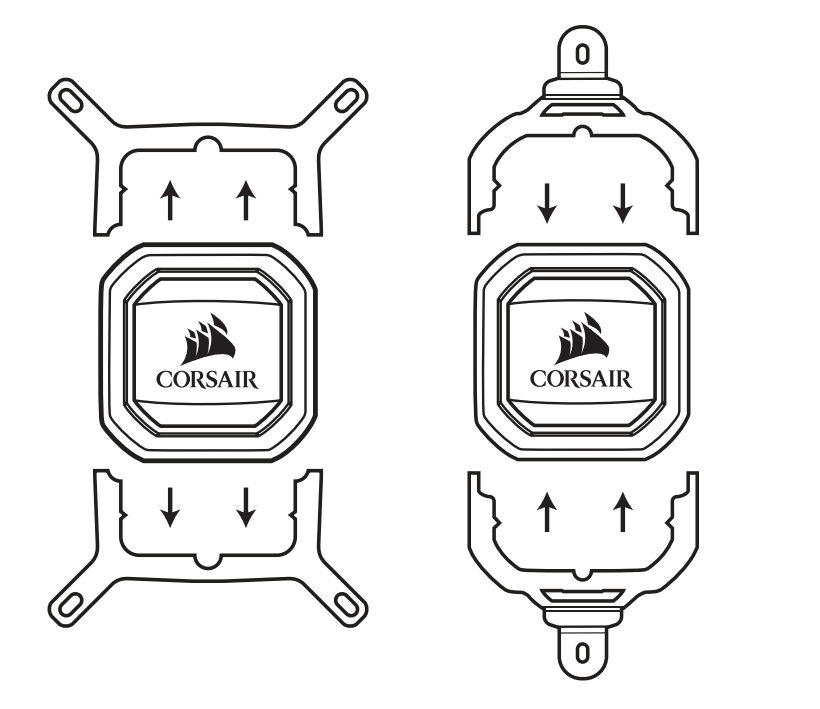
The pump head of the iCUE RGB ELITE Liquid CPU cooler comes pre-installed with the Intel mounting bracket. If you are using an AMD system, you will need to replace the mounting bracket with one that is AMD-compatible.
To install AMD mounting brackets on the pump head:
- Remove the thermal paste plastic cover from the pump head.
- Remove the two halves of the Intel mounting bracket from the pump head.
- Insert the two halves of your AMD mounting bracket into the pump head.
-
NOTE: Make sure you do not touch or smudge the thermal paste on the pump head.
-
NOTE: Make sure you do not touch or smudge the thermal paste on the pump head.
Step three: Installing the backplate
Once your pump head has the proper mounting bracket installed, it is time to prepare the backplate.
If you have an Intel system:
- Remove the adhesive film protector from the back of the Intel backplate.
- Align the backplate to the mounting holes on the back of your motherboard.
- Attach the backplate to the back of the motherboard.
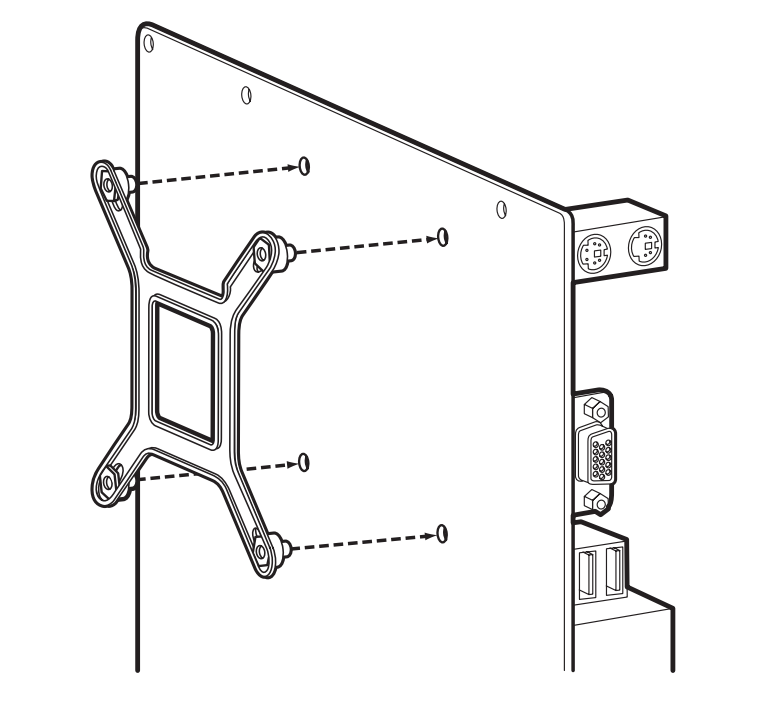
- Install the provided standoffs by screwing them onto the mounting posts of the backplate through the front of the motherboard.
If you have an AMD system:
- Unscrew and remove the plastic retention clips on the motherboard socket.
- Attach the default AM4 backplate onto the back of the motherboard.
- Install the provided standoffs by screwing them onto the mounting posts of the backplate through the front of the motherboard.
Step four: Installing the radiator and pump head
Once you have installed the backplate onto your motherboard, it is time to mount your radiator and install the pump head onto your CPU:
- Install the radiator onto the desired location in your system.
- Secure the radiator using the provided screws.
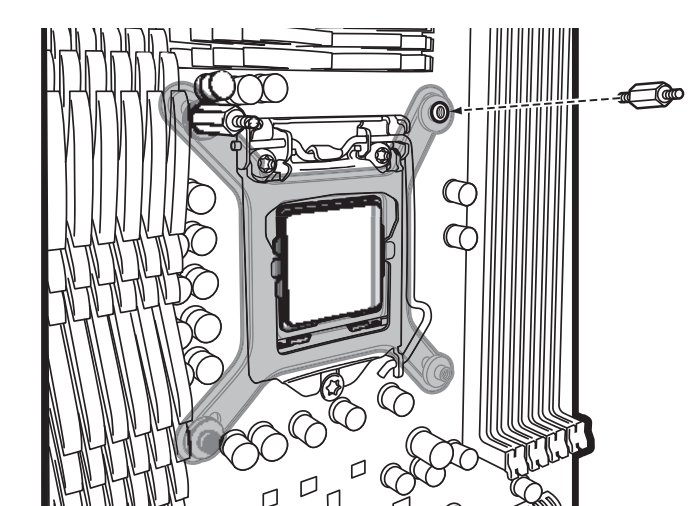
- Install your pump head onto your CPU by lining up the holes in the mounting bracket with the standoffs you installed in the motherboard.
- Install the thumbscrews provided with your cooler onto the standoffs, and then tighten to secure the pump head onto the CPU.
Step five: Plugging in the necessary cables
Once your radiator and the pump head are installed into the system, the final step is to plug in all the necessary cables so that you can customize your cooler settings in iCUE.
- Plug the cooler's USB-C cable into the pump head.
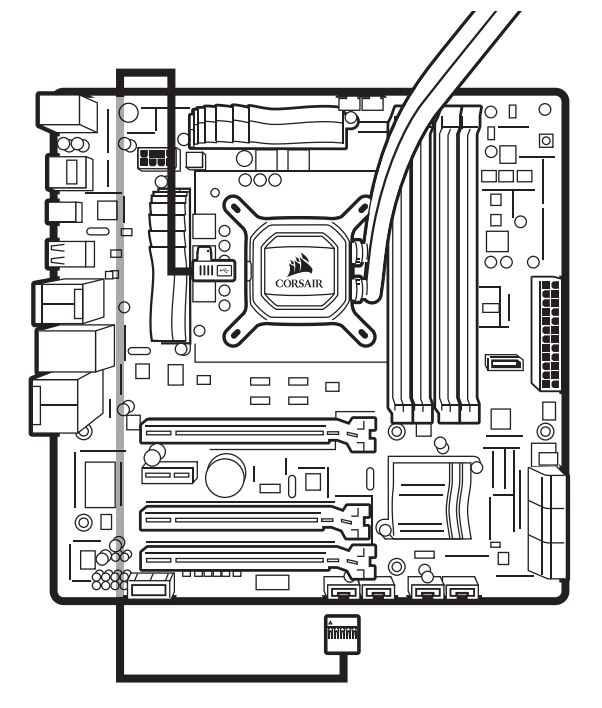
- Route the other ends of the cable behind your motherboard tray.
- Connect each of the fans on the radiator to the cooler's PWM fan splitter.
- Connect the pump tach cable to the CPU_FAN header on your motherboard.
- Connect the data cable into the USB 2.0 Internal header on your motherboard.
- Connect the pump power cable to an available SATA power plug.
Once you have plugged in all the necessary cables, power on your system.
Make sure you have iCUE installed and updated to its latest version. If you have installed your cooler correctly, you should see the cooler on the home screen of iCUE.
POWIĄZANA ZAWARTOŚĆ


