Choosing the right M.2 SSD form factor is critical when putting together a PC build, as it defines whether the SSD fits your PC case and motherboard. M.2 SSD form factor support varies from motherboard to motherboard. To verify compatibility, check your motherboard’s specifications/manual.
"Form factor" refers to the size and physical configuration of a storage device. For years, 2.5-inch and 3.5-inch form factor SATA SSD/HDDs have been the standard for PC builds. But in recent years, the M.2 form factor has become the go-to for storage devices due to its price-performance ratio, smaller footprint, and ease of installation.
If you have just acquired a CORSAIR M.2 SSD to upgrade your PC and are wondering how to install it, we’ve got you covered here.
INSTALL YOUR CORSAIR M.2 SSD
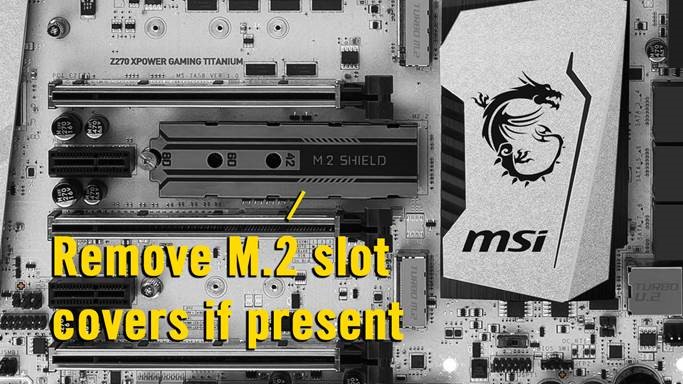
First, you need to Identify M.2 slots on your motherboard, note that they may be underneath heatshields, depending on your motherboard model. If you do not immediately see a M.2 slot, refer to your motherboard’s manual to determine their locations.


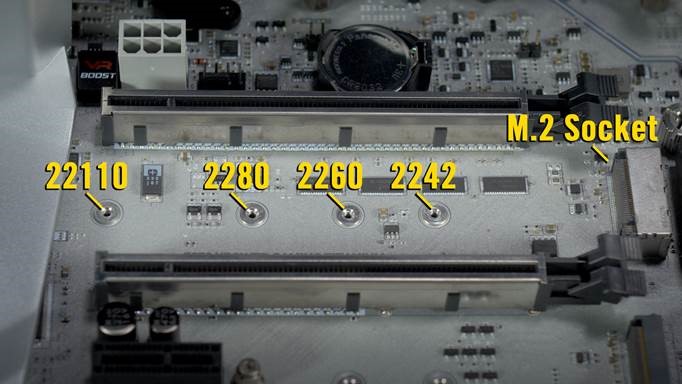
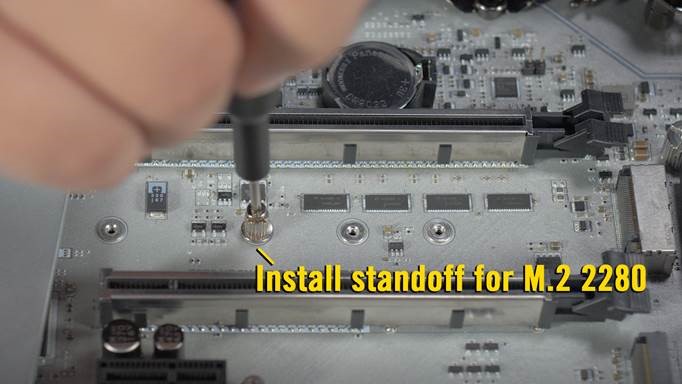
Next, ensure that the M.2 standoff is installed in the correct location for your SSD. CORSAIR M.2 SSDs are generally 2280 form-factor—double-check its sizing via your M.2 SSD’s product page. You may use a screw driver or simply hand tighten the standoff.

If there is an existing M.2 screw installed in the standoff, remove the M.2 screw with your Philips-head screwdriver—size may differ depending on your motherboard model.

If your M.2 slot is underneath a cover (aka heatsink or heatshield), there will be a visible thermal pad. If there is a plastic peel on the thermal pad, please carefully remove the peel to ensure the thermal pad remains in place and intact.

If you are using one of our M.2 SSDs with a heatsink (eg. MP600 PRO LPX), you may need to remove the thermal pad entirely for installation.

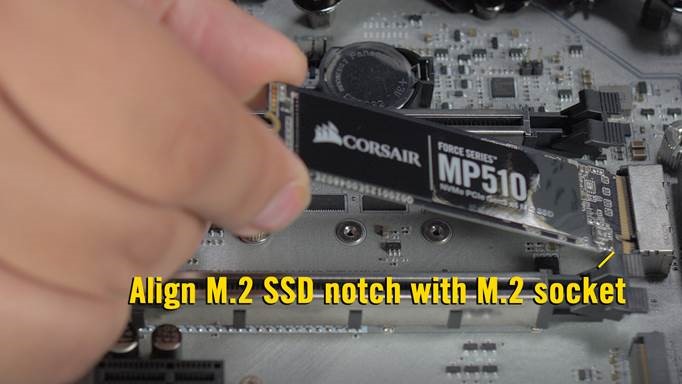
To install the M.2 SSD, insert the M.2 SSD at an angle—example below, then gently lay the M.2 SSD down on the standoff.

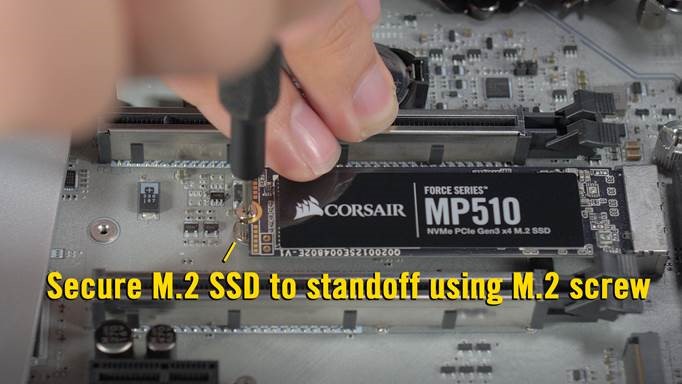
Once the M.2 SSD is in place, secure it using the M.2 screw which you removed earlier, or secure it via your motherboard’s mechanical lever (if offered).

NOTE: If you are installing an M.2 SSD without a heatsink and your motherboard’s M.2 slot was underneath a cover, please reinstall the cover.

And just like that, your PC is now equipped with an M.2 SSD.
Old article below
This article will teach you how to install your Corsair M.2 SSD.
NOTE: The instructions in this article only apply to the Corsair M.2 SSD, which has a form factor of 2280. If your M.2 has a different form factor, please refer to your motherboard manual for installation instructions.
Before installing your SSD:
To install your SSD:
If you run into any issues or have further questions, contact our Customer Support.


