매뉴얼 | 빠른 시작 가이드
복수 PC
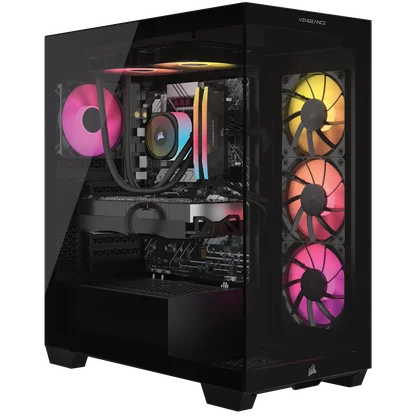
벤전스 7000 시리즈
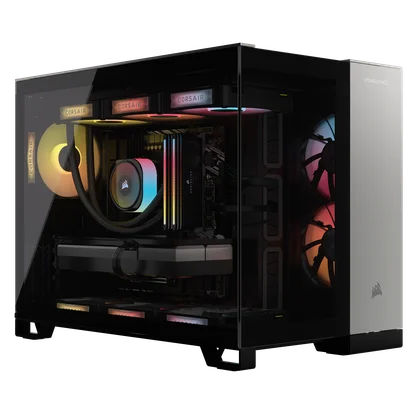
벤전스 5000 시리즈
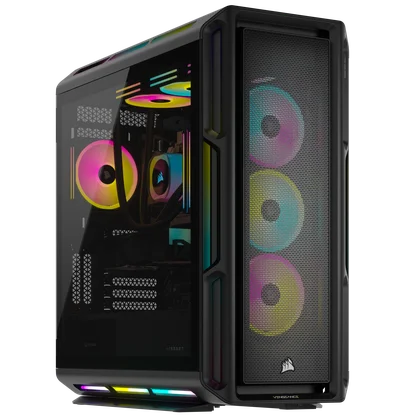
벤전스 8000 시리즈
복수 PC 소개
CORSAIR VENGEANCE PC를 구매해 주셔서 감사합니다!
복수 PC 콘텐츠

맨 위 시트

전원 케이블

와이파이 안테나
복수 PC 연결성


- 힘
- USB 3.2 Type-A (1세대)
- USB 3.2 Type-C (Gen 2)
- 3.5mm 오디오 콤보 잭
- 초기화

- 플래시 BIOS 버튼
- USB 2.0
- 키보드/마우스 PS/2 커넥터
- HDMI
- 디스플레이 포트
- USB 3.2 Gen 1 Type-A
- USB 2.0
- USB 3.2 Gen 2x2 Type-C
- USB 3.2 Gen 2 Type-A
- LAN 포트
- 와이파이 / 블루투스
- 7.1 HD 오디오 커넥터
- HDMI (GPU에서)
- 디스플레이 포트(GPU에 있음)
- 캡처 카드의 HDMI 입력(해당되는 경우)
- HMDI OUT on Capture Card (해당되는 경우)
- 전원 공급 커넥터
참고: 포트 연결 및 배치는 설치된 마더보드에 따라 다를 수 있습니다.
복수 PC 설정
복수 PC 언박싱
CORSAIR VENGEANCE PC에는 전원 공급 장치 전원 코드와 데스크탑 뒷면에 설치될 와이파이 안테나가 함께 제공됩니다. 전원을 켜기 전에 모든 장치를 연결하여 시스템 전원이 켜졌을 때 즉시 사용할 수 있도록 하십시오.
- CORSAIR VENGEANCE PC를 포장에서 안전하게 꺼내십시오.
- Vengeance PC에서 상단과 하단의 배송용 보호 폼을 제거합니다.
- 책상 위에 Vengeance PC를 올려놓고 설정 과정을 계속하십시오. Vengeance PC를 바닥에 두는 것을 선호하는 경우, 카펫 위에 두지 마십시오. 카펫은 열을 발생시킬 수 있습니다. 최상의 결과를 얻으려면 Vengeance PC를 바닥에서 띄워 놓으십시오.
- 복수 PC에는 계속하기 전에 제거해야 하는 내부 포장재가 들어 있습니다. 유리 측면 패널을 안전하게 제거하여 포장재를 제거하십시오. 측면 패널 제거에 대한 지침은 아래 비디오를 참조하십시오.
코세어 4000과 5000 시리즈 케이스의 유리 패널을 제거하는 방법
복수 PC 연결
- 케이스 뒷면에 있는 마더보드의 USB 포트를 통해 마우스, 키보드, 기타 장치를 데스크탑에 연결합니다.

2. HDMI 또는 디스플레이 케이블을 사용하여 모니터를 그래픽 카드에 연결합니다.

3. 시스템에 있는 와이파이 포트에 와이파이 안테나를 연결합니다. 인터넷 접속을 위해 이더넷 케이블을 사용하는 것을 선호한다면, 이더넷 케이블을 연결합니다.

4. 전원 케이블을 전원 공급 장치에 연결한 다음, 전원 케이블의 다른 쪽 끝을 가장 가까운 전원 콘센트에 연결합니다. 서지 보호기를 사용하는 경우, 전원 케이블을 서지 보호기에 연결합니다.
5. 전원 스위치를 켜고 데스크탑 상단에 있는 전원 버튼을 누릅니다.

6. 시스템이 초기 부팅 과정을 거치면, 사전 설치된 윈도우 운영 체제가 로딩됩니다.
7. 윈도우즈의 안내에 따라 사용자 계정 생성을 완료합니다.
아이큐 소프트웨어
iCUE를 사용하여 시스템 온도를 모니터링하고, 사용자 지정 팬 곡선을 설정하고, RGB 온도 알림을 생성할 수 있습니다. 복수 PC의 경우, 팬 곡선이 기본적으로 Balanced로 설정되어 있어, 최저 소음 수준에서 최고의 성능을 제공합니다. 미리 정의된 다른 옵션인 Quiet과 Extreme을 전환하거나, 자신만의 팬 곡선 프로필을 만들 수 있습니다. CORSAIR 주변기기를 사용할 때, iCUE는 마우스를 보정하고 DPI를 조정하고, 매크로를 기록하고 키와 버튼을 다시 매핑하고, 헤드셋 오디오 설정을 미세 조정하는 기능을 내장하고 있습니다.
iCUE 소프트웨어 사용법에 대한 자세한 내용은 아래 링크를 참조하십시오.
코세어 아이큐로 RGB 마에스트로가 되세요
iCUE의 최신 기능인 벽화에 대해 자세히 알아보려면 아래 링크를 클릭하세요.
게임용 iCUE MURALS 설정 방법
CORSAIR iCUE에서 팬 커브 설정하기
Vengeance PC의 팬 곡선을 설정하는 방법을 알아보려면 아래 링크를 클릭하십시오.
CORSAIR iCUE에서 팬 커브 설정하기
CORSAIR iCUE 튜토리얼 재생목록을 검토하여 주변기기, 액세서리, 구성요소에 대한 iCUE 설정에 대한 자세한 정보를 얻으십시오: CORSAIR iCUE 튜토리얼
CORSAIR 진단
CORSAIR Vengeance PC에는 Vengeance PC의 개요를 제공하고, 구성 요소를 진단 및 평가하며, 데스크톱에 발생한 문제를 보고하고, 설치된 응용 프로그램의 개요를 보여주는 등 다양한 기능을 제공하는 CORSAIR DIAGNOSTICS 유틸리티 소프트웨어가 포함되어 있습니다. 아래의 지침에 따라 모든 CORSAIR DIAGNOSTICS 기능에 액세스하십시오.
홈 페이지
CORSAIR DIAGNOSTICS는 데스크탑에 있습니다.

홈페이지에 구입하신 Vengeance PC가 표시되고, CORSAIR DIAGNOSTICS에서 이용 가능한 모든 기능이 표시됩니다.

분석
분석 기능에서는 개별 구성 요소를 평가하여 제대로 작동하는지 확인할 수 있습니다. 또는 전체 품질 평가를 위해 모든 구성 요소를 한 번에 테스트할 수 있습니다. 테스트는 한 번 반복하거나 확장 테스트를 위해 여러 번 반복하도록 구성할 수 있습니다.

테스트가 완료되면 합격/불합격 여부, 완료된 루프 수, 테스트 완료에 걸린 시간이 표시됩니다.

"결과로 이동" 버튼을 클릭하면 평가의 전체 결과로 이동합니다. 결과는 구성 요소에서 실행된 각 테스트와 함께 합격/불합격 알림과 함께 표시됩니다.

체크업
체크업 기능에서는 구성 요소에 대한 스트레스 테스트를 수행할 수 있습니다. 이 작업은 순차적으로 수행하거나 모든 구성 요소에 대한 스트레스 테스트를 한 번에 수행할 수 있습니다. 시작하려면 "동시" 또는 "순차"를 선택하고 체크업 테스트를 시작합니다.

시험이 완료되면 합격/불합격 결과와 시험을 완료하는 데 걸린 시간이 표시됩니다.

"결과로 이동" 버튼을 클릭하면 평가의 전체 결과로 이동합니다. 결과는 구성 요소에서 실행된 각 테스트와 함께 합격/불합격 알림과 함께 표시됩니다.

대화형 테스트
대화형 테스트 기능에서는 연결된 장치의 기능을 확인하고 제대로 작동하는지 확인할 수 있습니다. 장치를 선택하고 제공된 지침에 따라 연결된 장치를 평가합니다.

마우스 테스트는 연결된 마우스의 기능과 정확성을 평가합니다.

키보드 테스트는 연결된 키보드의 기능과 정확성을 평가합니다.

GPU 테스트는 설치된 그래픽 카드를 평가하는 대화형 테스트입니다. 이 섹션에 제공된 지침에 따라 GPU 테스트를 완료하십시오. 테스트를 중단한 후에는 결과를 보고서에 추가하기 위해 "합격" 또는 "불합격"을 선택해야 합니다.

시스템 정보
시스템 정보 섹션은 구성과 레이아웃을 포함한 시스템의 전체 하드웨어 및 소프트웨어 정보를 제공합니다. 또한 Vengeance PC에서 발생한 모든 이벤트에 대한 자세한 로그를 제공합니다.

윈도우 지원
윈도우 지원 기능은 벤전스 PC의 윈도우 설정을 최적화하기 위한 다양한 옵션을 제공합니다. 이러한 옵션에는 저장 드라이브 최적화, 최적의 전원 옵션 설정, 데스크탑 개인화 등이 포함됩니다.

이벤트 캘린더
이벤트 캘린더 섹션에서는 Vengeance PC에서 발생한 오류 로그와 애플리케이션 이벤트를 볼 수 있습니다. 이벤트의 심각도에 따라 캘린더에 색상 큐브로 표시됩니다.

ELGATO 캡처 카드
CORSAIR Vengeance PC에 캡처 카드가 있거나 Vengeance PC에 설치할 Elgato 캡처 카드를 구입한 경우, 아래에 나열된 비디오를 통해 Elgato 캡처 카드의 설치 및/또는 사용 방법에 대한 자세한 정보를 확인할 수 있습니다.
ELGATO 4K60 PRO MK.2 설치 방법
OBS 스튜디오로 엘가토 캡처 카드를 설정하는 방법
ELGATO 4K60 PRO MK.2로 XBOX 시리즈 X|S를 설정하는 방법
닌텐도 스위치로 엘가토 4K60 프로 MK.2를 설정하는 방법
USB 연결
CORSAIR Vengeance PC는 다양한 USB 연결성을 가진 다양한 마더보드 모델을 제공합니다. 마더보드의 USB 포트는 속도와 연결 기능에 차이가 있습니다. USB 연결성과 기능에 대한 자세한 내용은 아래 링크를 참조하십시오.
모든 USB 포트가 같은가요? CORSAIR EX100U로 알아봅시다
구성 요소 업그레이드
CORSAIR VENGEANCE PC는 표준 ATX 폼 팩터 마더보드로 구성되어 있어 향후 업그레이드가 간편합니다. Vengeance PC의 기능을 확장하기 위해 추가 저장 공간이나 메모리를 구입하는 경우, 단계별 비디오 지침을 따라 쉽게 설치할 수 있습니다.
메모리 설치
NVMe M.2 SSD 스토리지 설치
최신 설정 및 문서에 액세스하기
드라이버 및 소프트웨어 액세스
CORSAIR VENGEANCE PC는 작동에 필요한 모든 드라이버와 소프트웨어가 사전 설치되어 있습니다. 드라이버와 소프트웨어의 최신 버전은 Corsair.com 제품 지원 페이지에서 다운로드할 수 있습니다.
준수 선언
CORSAIR은 제품을 배송하는 각 국가의 법률과 규정을 준수하기 위해 최선을 다하고 있습니다. CORSAIR 제품은 제품 안전, 전자파 적합성 및 기타 규제 의무 요건에 대한 적절한 세계 표준을 충족하도록 설계 및 테스트되었으며, 의도된 용도로 사용할 때 적합합니다.
제한적 제품 보증
CORSAIR VENGEANCE PC는 공인 CORSAIR 판매처에서 구매한 날로부터 2년 동안 하드웨어 보증이 제공됩니다. CORSAIR은 구매일로부터 시작되는 특정 기간 동안 제품에 재료 및 제조상의 결함이 없음을 보증합니다. 보증 기간은 사용자 설명서, 제품 패키지 또는 첨부된 CORSAIR 보증 기간 목록에 명시된 바와 같이 특정 제품에 따라 다릅니다. 이러한 보증 기간이 서로 다른 경우, 가장 긴 보증 기간이 적용됩니다.
해당 지역의 법률에 의해 금지된 경우를 제외하고, 이 보증은 최초 구매자에게만 적용되며 양도할 수 없습니다. 보증 권리를 행사하려면 판매 영수증을 제시하고 제품 일련 번호 정보를 제공해야 합니다. 이 보증은 귀하에게 특정한 법적 권리를 제공하며, 귀하는 현지 법률에 따라 달라지는 추가적인 권리를 가질 수 있습니다.
일반적으로 이 보증은 CORSAIR 하드웨어 제품이 데이터 시트에 명시된 대로 게시된 기술 사양에 따라 작동하며, 보증 기간 동안 해당 제품이 의도된 운영 환경에서 작동한다는 것을 의미합니다.
치료법
CORSAIR의 책임과 CORSAIR VENGEANCE PC 제품이 기술 사양에 따라 작동하지 않는 경우, CORSAIR의 단독 구제책은 CORSAIR의 재량에 따라 제품을 수리하거나 교체하는 것입니다. 이 보증 의무는 하드웨어를 원래 구입처 또는 CORSAIR의 지시에 따라 다른 장소에 반환하고, 원래 판매 영수증을 첨부하는 것을 조건으로 합니다. 배송료와 취급 수수료, 그리고 적용 가능한 관세, 의무, 세금 또는 기타 수수료를 지불해야 할 수도 있습니다. CORSAIR는 재량에 따라 신제품 또는 리퍼브 제품을 제공할 수 있습니다. 교체된 CORSAIR VENGEANCE PC는 원래 보증 기간의 잔여 기간 또는 30일(둘 중 더 긴 기간) 동안 또는 현지 법령에서 요구하는 기간 동안 보증됩니다.
단종 또는 생산 중단 제품
구형 또는 단종된 제품은 동일한 제품이 있는 경우, 그 제품으로 대체됩니다. CORSAIR이 구형 또는 단종된 CORSAIR VENGEANCE PC 제품을 동일한 제품으로 대체할 수 없는 경우, CORSAIR은 단독 재량에 따라 구형 또는 단종된 CORSAIR VENGEANCE PC 제품을 유사한 기능과 용량을 가진 CORSAIR VENGEANCE PC 제품으로 대체합니다.
제외
이 보증은 다음에 한정되지 않고, 다음에 기인하는 문제나 손상에 대해서는 적용되지 않습니다:
- 정상적인 사용과 관련된 마모.
- 수정, 오용, 사고, 분해, 오용 또는 무단 수리.
- 일련 번호 또는 규제 라벨 제거.
- 제공된 제품 설명서에 따르지 않는 사용을 포함한 부적절한 작동.
- 부적절한 전압 공급 장치에 연결.
- 재료 또는 제조상의 결함과 관련이 없는 기타 원인. 또한, 이 보증에서 제외되는 것은 위조된 CORSAIR VENGEANCE PC 제품입니다. 즉, CORSAIR이 단독 재량에 따라 CORSAIR 또는 공인 제조 파트너가 제조하지 않았다고 판단한 제품입니다.
저작권/법적 정보
© 2023 CORSAIR MEMORY, Inc. All rights reserved. CORSAIR과 돛 로고는 미국 및/또는 기타 국가에서 CORSAIR의 등록 상표입니다. 기타 모든 상표는 해당 소유자의 자산입니다. 제품이 사진과 약간 다를 수 있습니다.
책임의 한계
CORSAIR는 귀하의 제품에 대한 명시적 또는 묵시적 보증 위반으로 인한 이익, 수익 또는 데이터(직접적이든 간접적이든)의 손실 또는 상업적 손실을 포함하되 이에 국한되지 않는 모든 특수, 우발적, 간접적 또는 결과적 손해에 대해 책임을 지지 않습니다. 일부 현지 법률에서는 특수, 간접, 부수적 또는 결과적 손해의 배제 또는 제한을 허용하지 않으므로, 이러한 제한 또는 배제가 귀하의 관할권에서 적용되지 않을 수 있습니다.
FCC ID 포함: PD9AX200NG
IC 포함: 1000M-AX200NG
관련 콘텐츠

