매뉴얼 | 빠른 시작 가이드
CORSAIR iCUE XC7 RGB ELITE LCD CPU 워터 블록
RGB 및 LCD 스크린이 탑재된 맞춤형 냉각 CPU 워터 블록

시작하기 전에
www.corsair.com/downloads 에서최신 버전의 iCUE를 다운로드하세요.
패키지 내용물

1개 XC7 RGB 엘리트 LCD 워터 블록

1개 Intel LGA 1851/1700 마운팅 브라켓

1개 AMD AM5/AM4 마운팅 브라켓

1개 Intel LGA 1851/1700 CPU 백플레이트
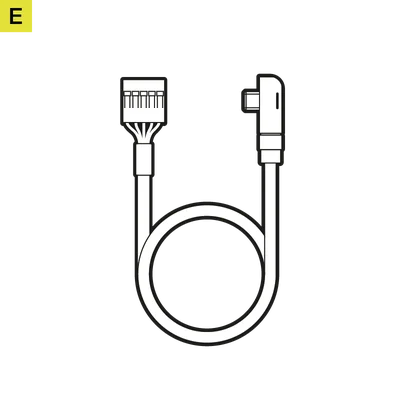
1개 USB Type-C 90도 케이블 600mm

1개 AM5/AM4 백플레이트 접착제
필수 구성요소(포함되지 않음)

필립스 헤드 스크루드라이버

내장형 USB 2.0 헤더
(메인보드 또는 USB 내장 허브)

iCUE 버전 5.5 이상

Microsoft Windows 10 이상

인텔 설치
1. 인텔 CPU 브라켓을 설치하십시오.
XC7 RGB ELITE는 어떤 방향으로든 설치 가능합니다. 제품을 90° 또는 180° 회전하여 설치하더라도 성능 저하가 발생하지 않습니다. 수냉 블록의 하단 부분에 있는 TIM 보호 커버를 제거해 주세요. 열전도 재료에 직접 접촉하지 마세요.
1a. Intel LGA 1851/1700 브라켓을 펌프의 슬롯에 양쪽을 밀어 넣어 단단히 고정될 때까지 설치합니다(그림 1).

1b. (D) Intel LGA 1851/1700 CPU 백플레이트의 자체 접착면에서 보호 필름을 제거합니다(그림 2 참조).
1c. 자체 접착면을 메인보드 뒤쪽에 위치시키고, 아래 그림(그림 3)과 같이 구멍을 맞춥니다.

2. XC7 RGB ELITE LCD 설치
2a. XC7 RGB ELITE LCD를 메인보드에 설치합니다(그림 1*).
2b. 스크루드라이버를 사용하여 나사를 조여 XC7 RGB ELITE LCD를 메인보드에 고정합니다. 나사를 조일 때 나사산 끝까지 완전히 조여야 합니다. 나사는 균일하게 조이며, 가능하면 십자 모양으로 조이는 것이 좋습니다(그림 2*).

AMD AM5/AM4 설치
1. AMD AM5/AM4 마운팅 브래킷 설치
AMD AM5/AM4 브라켓을 펌프의 슬롯에 양쪽을 밀어 넣어 단단히 고정합니다(그림 1).
워터 블록의 하단 부분에 있는 TIM 보호 커버를 제거합니다. 열전도 재료에 닿지 않도록 주의하십시오.

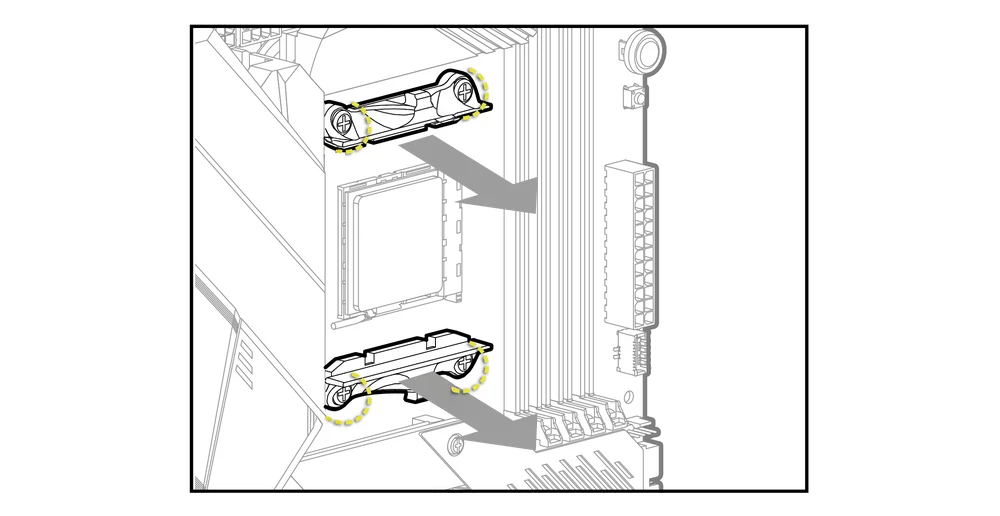
2. 설치 준비
4개의 십자 나사를 풀어 기존 AMD AM5/AM4 장착 브래킷을 제거합니다.
3. XC7 RGB ELITE LCD 설치

3a. XC7 RGB ELITE LCD를 원래 AMD AM5/AM4 백플레이트가 미리 설치된 상태로 메인보드에 설치합니다(그림 1*).
3b. 스크루드라이버를 사용하여 XC7 RGB ELITE LCD를 메인보드에 고정합니다. 나사를 끝까지 조여주세요. 나사는 균일하게 조여주며, 가능하면 십자 모양으로 조여주세요(그림 2*).

피팅 및 튜브 설치
1. CORSAIR XF G1/4" BSPP 피팅 설치
물 블록 포트에 적절한 CORSAIR XF G1/4" BSPP 나사식 피팅(별매) 2개를 설치하고 손으로 조입니다. 아래 그림에 표시된 대로 지정된 입구와 출구를 확인합니다. 입구는 항상 물 블록의 외부 표면에 있는 커넥터에 가장 가깝게 위치합니다.

2. 튜브 설치
CORSAIR XF 피팅 유형에 맞는 튜브를 설치하고 링을 잠그고 고정하여 워터 블록을 수냉 루프에 설치합니다. 압축 피팅 이외의 피팅을 사용할 때는 적절한 고정 방법과 튜브를 사용하십시오. 시스템의 누수 테스트를 잊지 마십시오.
시스템 연결
통합 스마트 기능 연결 및 사용
www.corsair.com/downloads에서 최신 버전의 iCUE를 다운로드하세요.
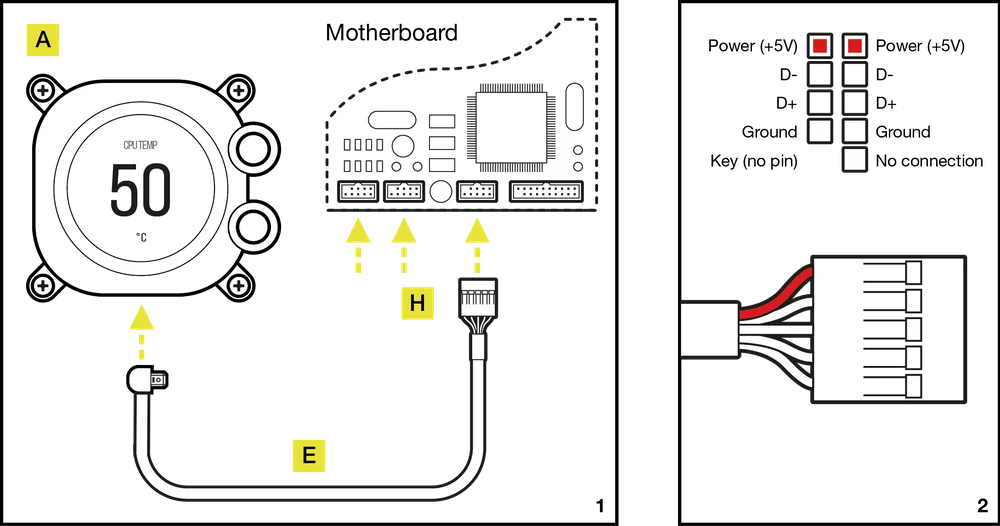
XC7 RGB ELITE LCD CPU 워터 블록의 스마트 기능을 사용하려면 워터 블록의 USB-C 포트에서 USB 2.0 마더보드 내부 헤더에 포함된 90도 USB-C 케이블을 연결해야 합니다. 5핀 USB 헤더는 마더보드 USB 2.0 내부 헤더의 어느 채널에서나 작동하도록 설계되었습니다(그림 1).
XC7 RGB ELITE LCD USB 2.0 헤더 케이블을 연결하여 빨간색 선이 마더보드의 USB 2.0 헤더에 있는 전원 핀과 정렬되도록 합니다(그림 2).
XC7 RGB ELITE LCD를 단독으로 사용할 수 있나요?
아닙니다. 이것은 CPU용 수냉식 냉각판으로, 독립형 펌프와 라디에이터를 포함한 완전한 맞춤형 수냉식 냉각 시스템이 필요합니다. 자세한 내용은 Hydro X 시리즈 페이지를 방문하십시오.
알루미늄 수냉 장비를 갖춘 XC7 RGB ELITE LCD를 사용할 수 있습니까?
아니요, 혼합할 수 없습니다. 냉각판은 니켈 도금 구리로 만들어졌기 때문에 알루미늄과 혼합해서는 안 됩니다.
흐름 방향이 중요한가요?

그렇습니다. XC7 RGB ELITE LCD는 INLET 포트를 통해 냉각수가 유입될 때 가장 잘 작동합니다. 그러나 냉각 성능은 떨어지지만, 역방향으로 냉각수가 유입되더라도 작동합니다.
XC7 RGB ELITE LCD 워터 블록에 미리 도포된 열전도성 페이스트를 다시 설치할 때 재사용할 수 있나요?
XC7 RGB ELITE LCD 워터 블록을 다시 설치하려면 미리 도포된 써멀 페이스트를 깨끗이 닦아내고 새로운 써멀 페이스트를 도포해야 합니다. 별도로 판매되는 CORSAIR XTM70을 사용하는 것이 좋습니다.
XC7 RGB ELITE LCD에 어떤 열전도성 접착제가 사용됩니까?
LCD 깜빡임 현상이 발생하면 어떻게 해야 하나요?
보증

HYDRO X 시리즈 핵심 제품(CPU 및 GPU 블록, 펌프, 라디에이터)은 3년 보증이 적용됩니다.
법적
© 2025 CORSAIR MEMORY, Inc. 모든 권리 보유.
CORSAIR, 돛 로고 및 HYDRO X SERIES는 미국 및 기타 국가에서 CORSAIR의 등록 상표입니다. 기타 모든 상표는 각 해당 소유자의 재산입니다.
제품의 실제 모습은 사진과 약간 다를 수 있습니다.
관련 콘텐츠


