HOW TO
How to: Install the CORSAIR Hydro X Series XC7 RGB on AMD AM4
Have an AMD AM4 socket and need some help installing your XC7 RGB cooler? We have a video to help walk you through the installation process.
Video instructions
Preparing to install the XC7 RGB
When installing the XC7 RGB onto your AMD AM4 socket, you will need to first remove the original mounting bracket and install the AMD AM4 backplate.
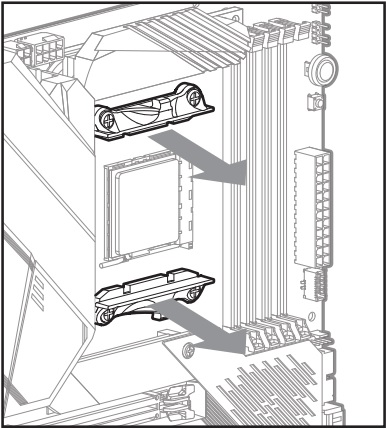
- Remove the original AM4 mounting bracket on your motherboard.
- Stick the provided dual-sided tape onto the AM4 backplate.
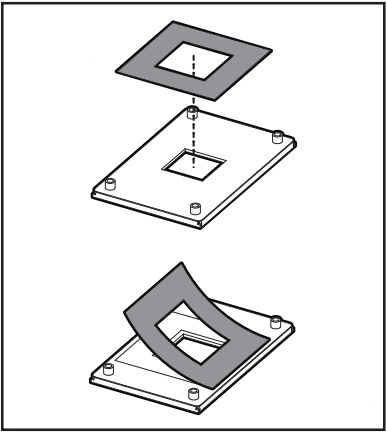
- Use the dual-sided tape to secure the AM4 backplate onto the backside of the motherboard.
- Make sure that the holes on the backplate are properly aligned with the holes on your motherboard.
You will also need to remove the Intel LGA 1200 bracket around the XC7 RGB water block and install the AMD AM4 mounting bracket.
- Remove the TIM protective cover from the underside of the XC7 RGB water block.
- Rotate the bracket slightly clockwise until it stops.
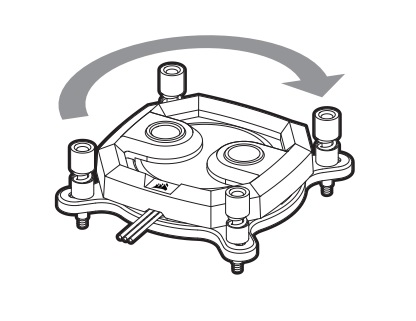
- Pull the bracket past the water block cold plate to remove it.
- Install the AMD AM4 mounting bracket onto the water block.

Installing the XC7 RGB
Once you have installed both the AMD AM4 backplate onto your motherboard and the AMD AM4 mounting bracket onto your XC7 RGB water block, you can now install the cooler onto your motherboard.
- Place the water block on the AMD AM4 backplate.
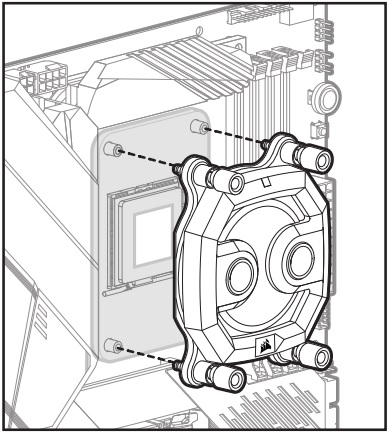
- Tighten the screws of the XC7 RGB to secure it onto the backplate.
- Use the included RGB adapter cable to connect the XC7 RGB to a CORSAIR lighting controller, another Hydro X series component, or a motherboard RGB header.
Once you have finished installing the XC7 RGB, you can use iCUE to customize the RGB lighting on your cooler.
관련 콘텐츠


