HOW TO
ハウツーiCUEでLS100 RGB照明ストリップを設定する
This article will teach you how to set up your LS100 RGB lighting strips and apply lighting effects via iCUE.
Make sure that your iCUE version is 3.34 or later. If you have upgraded iCUE to version 4 or newer, use this article to help set up your lighting strips.
For iCUE version 4 or newer
- Setting up your lighting strips
- Setting up the hardware lighting channel
- Updating lighting strip firmware
- Video instructions
Setting up your lighting strips
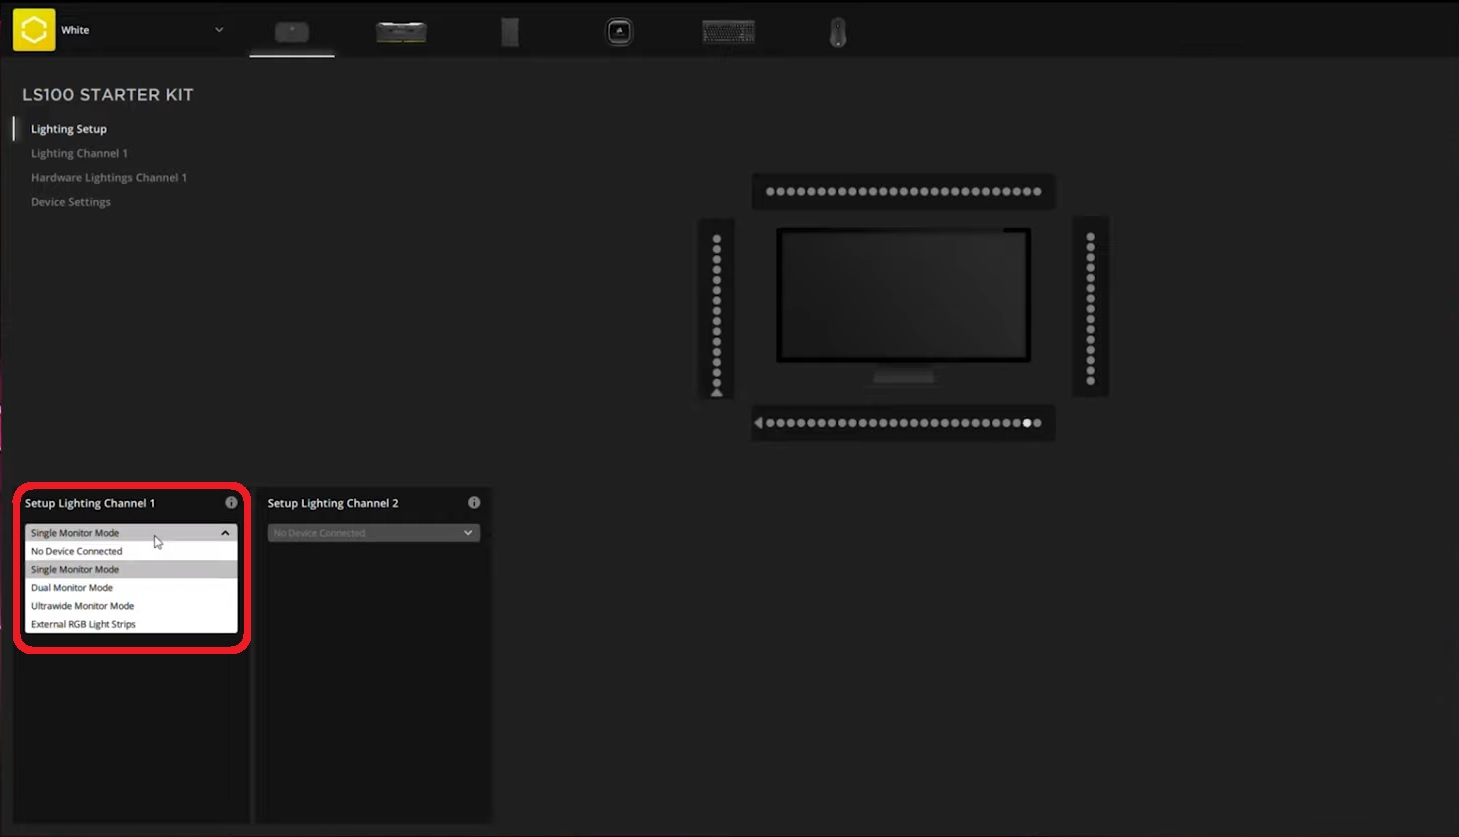
To set up your LS100 lighting strips in iCUE;
- Open iCUE.
- Hover your mouse over LS100 STARTER KIT on the homescreen.
- Click Lighting Setup.
- In the Setup Lighting Channel section, use the dropdown menu to select your monitor configuration.
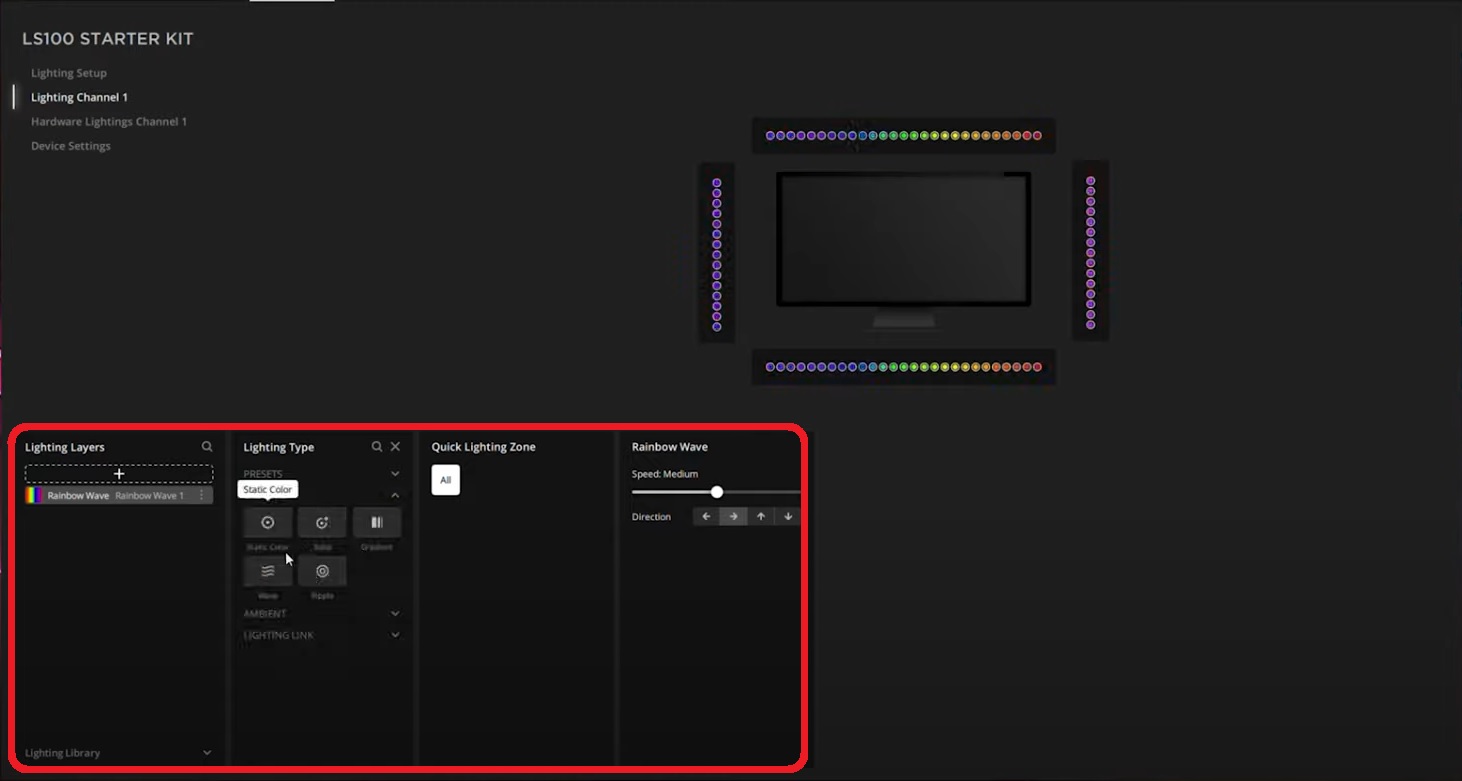
- Click Lighting Channel 1.
- Click the + button in the Lighting Layers section to create a new lighting layer.
- In the Lighting Type section, select the lighting effects you want to apply in your new lighting layer.
-
NOTE: Lighting Link effects will apply the lighting effect to all iCUE-compatible devices currently connected to your system.
-
NOTE: Lighting Link effects will apply the lighting effect to all iCUE-compatible devices currently connected to your system.
- Each lighting effect will have additional options for further customization; use those to customize the effects to your liking.
- Select where you want the lighting effect to occur by clicking individual lighting zones in the preview or dragging and selecting multiple lighting zones.
Setting up the hardware lighting channel
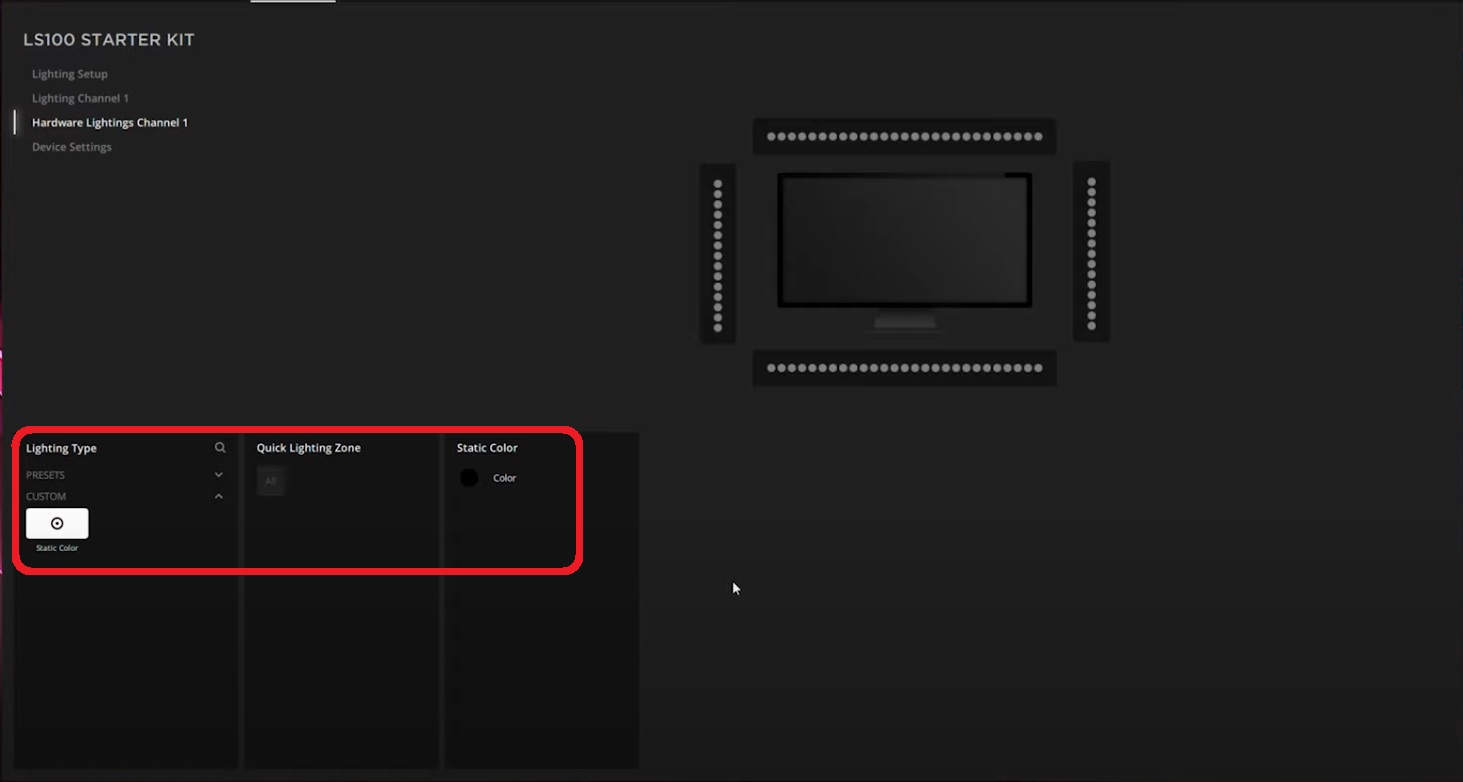
If you want your lighting strips to display certain lighting effects when iCUE is not running or when your PC system is turned off, you can do so by selecting Hardware Lightings Channel 1 and then customizing your desired lighting effect.
If you want the lighting strips to not display any lighting effects, choose Static Color for your lighting effect and set all RGB values to 0.
Updating lighting strip firmware
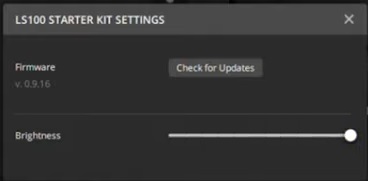
You an update the lighting strip firmware by selecting Device Settings and then clicking Check for Updates.
You can also adjust the brightness of your lighting strips in the SETTINGS window.
Video instructions
For iCUE version 3 or older
Setting up your lighting strips
To set up your LS100 RGB lighting strips, simply mount the strips to a metal surface using the magnetic clips on each strip. Connect the strips to each other using the connectors on the strips.
Once all of the strips are connected, connect the entire chain of strips to a lighting channel on an RGB LED controller.
Applying lighting effects in iCUE
Once your LS100 RGB lighting strips are connected together and plugged into a controller, open your iCUE software. You will now be able to apply lighting effects to your lighting strips.
- Click LIGHTING SETUP on the left menu.
- Click the dropdown menu under the lighting channel that your lighting strip chain is connected to, then select External RGB Light Strips.
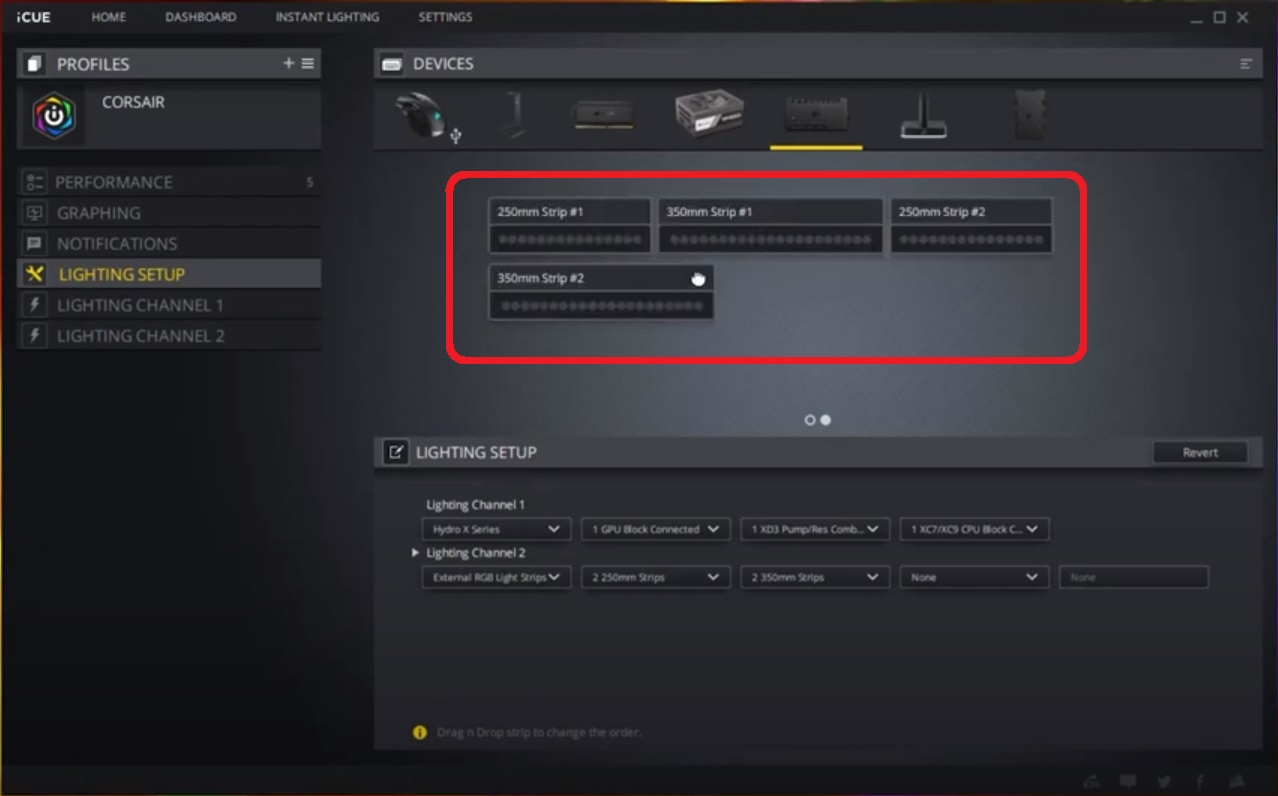
- Use the additional dropdown menus to specify the length of each strip in your chain.
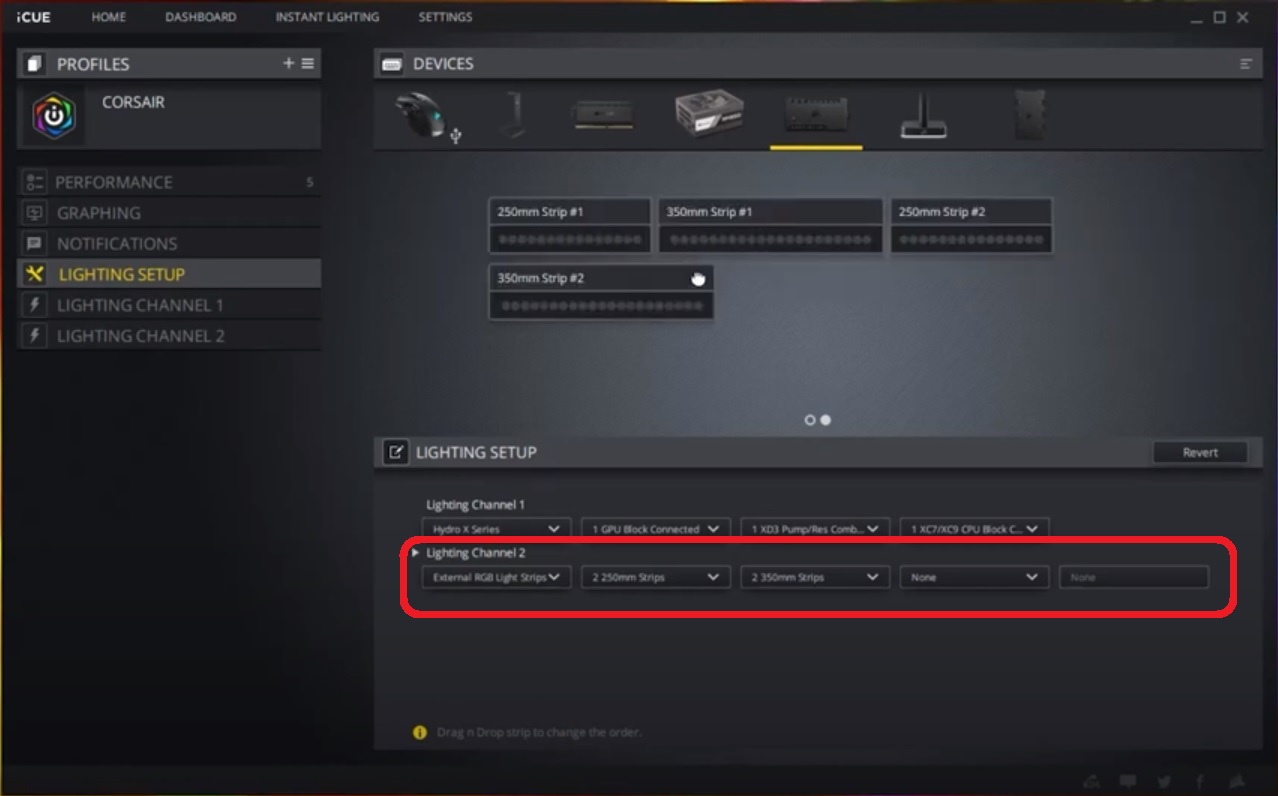
- Drag and drop the strip indicators into the order they are chained together.
- Click the lighting channel the light strips are connected to in the left menu.
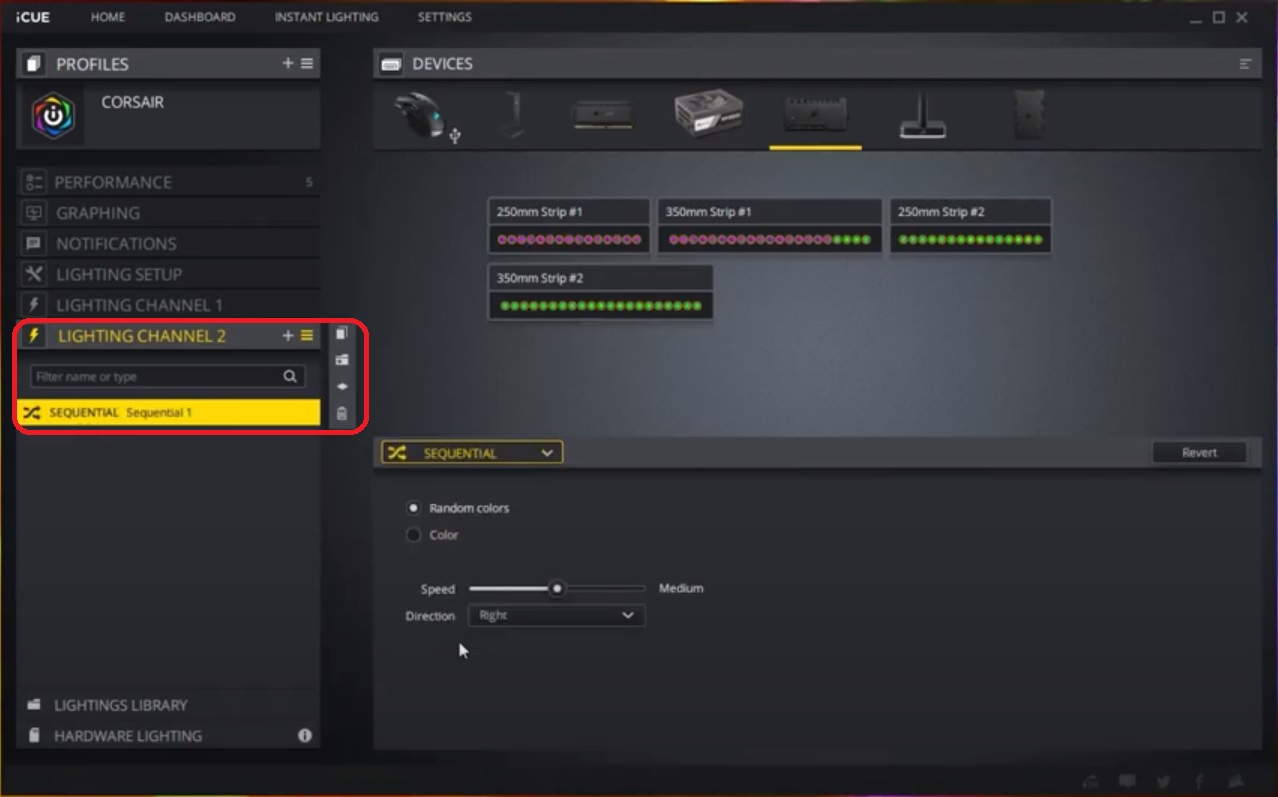
- Click the + button to add a new lighting effect.
- Customize the lighting effects of your strips however you want.
Video instructions
関連コンテンツ


