HOW TO
How to: Install your LC100 Case Accent Lighting Triangles
With the CORSAIR LC100 Case Accent Lighting Triangles, you can further personalize your PC with nine interconnected and customizable mini RGB lighting panels. This article contains instructions and a video on how to install the LC100.
Make sure your iCUE software is updated to the latest version before installing.
What is included
Make sure you have the following components from your purchase:
- 1x master LC100 triangle
- 8x companion LC100 triangles
- 4mm connection rods
- 5.5mm connection rods
- 1x Lighting Node Pro controller (only included in the starter kit)
Installing the LC100
Before you begin installation, make sure that your computer system is powered off. Once it is, follow the instructions below:
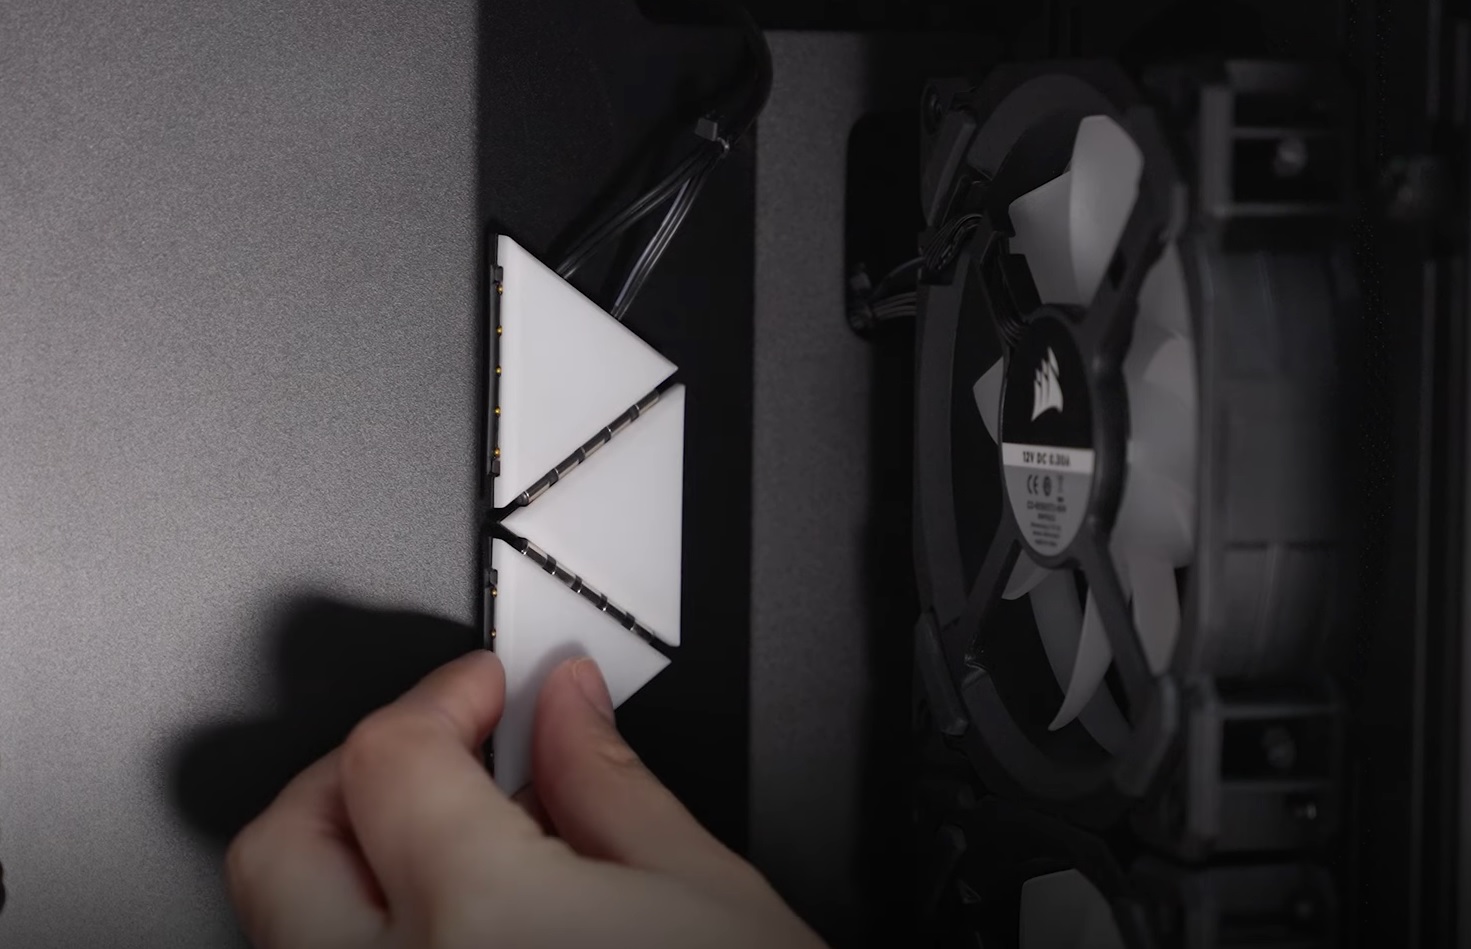
- Mount the LC100 master triangle onto a steel surface in your case.
- Use the 4mm or 5.5mm connection rods to connect the companion triangles onto the master triangle in whatever shape you want.
- The 5.5mm connection rods are used to help companion triangles bend around a corner at 90 degree angles.
- Up to 18 companion triangles powered by 2 master triangles can be controlled by a single RGB controller.
- Connect the master triangle's 3-pin RGB power connector to your RGB controller.
- Connect the master triangle's SATA power to your power supply unit.
- Connect the USB and SATA power of your RGB controller if you have not done so already.
Setting up the LC100 in iCUE
Once you have finished setting up the LC100 in your system, it is time to use iCUE to customize the RGB LED lighting. Make sure that the firmware of iCUE and your LC100 have been updated to the latest versions.
- Open iCUE.
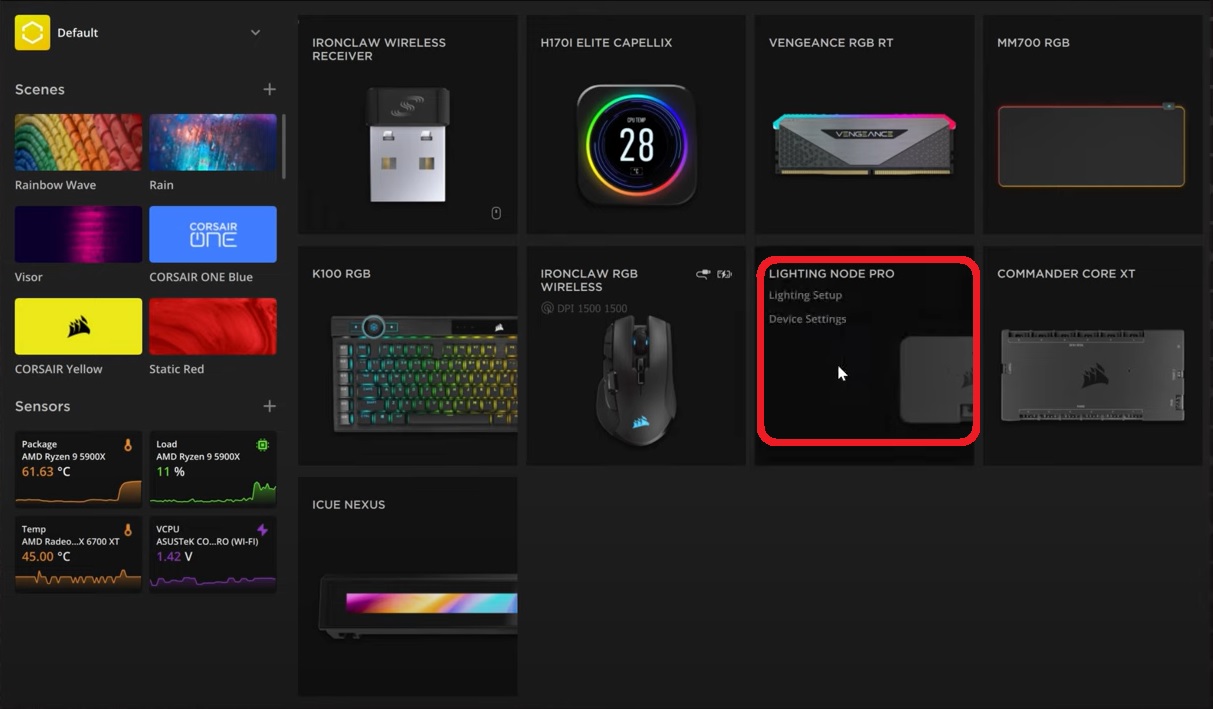
- Select your RGB controller on the home screen and click Lighting Setup.
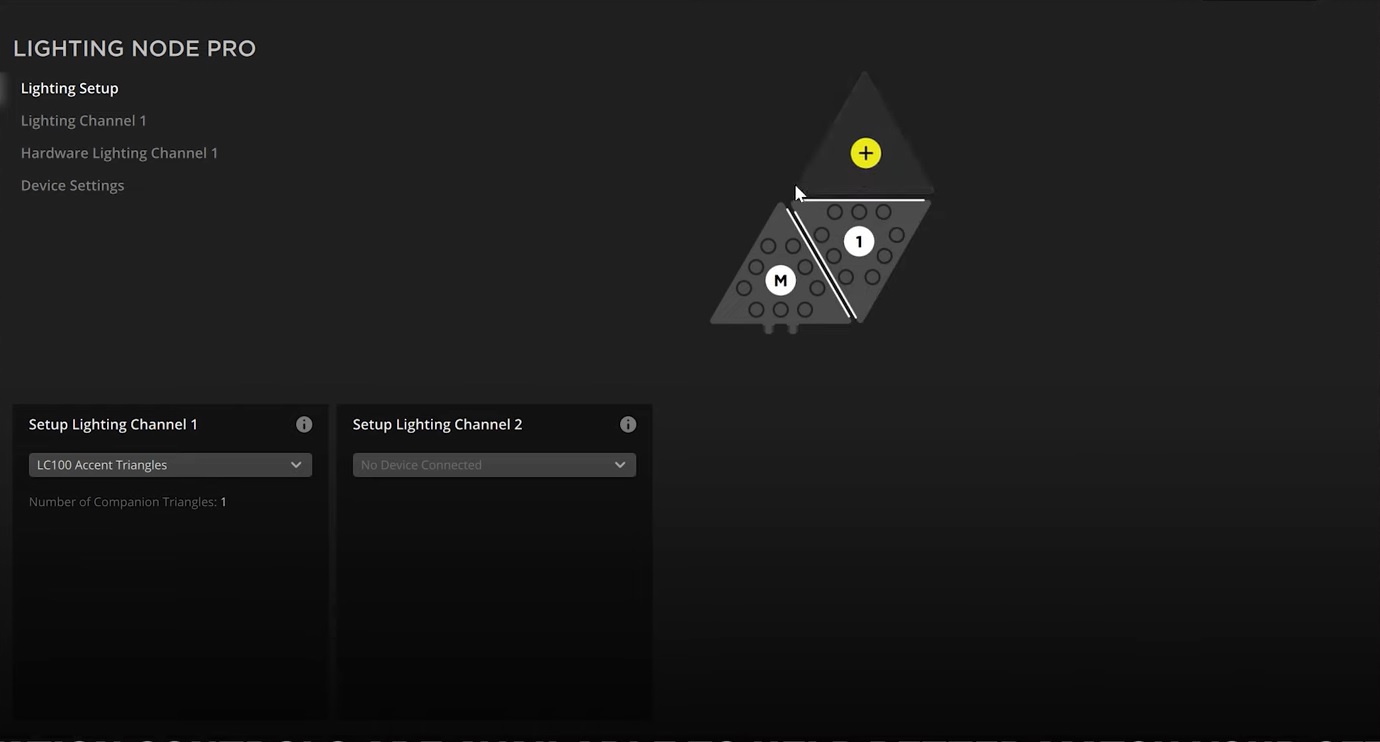
- Select LC100 Accent Triangles in the dropdown menu of the lighting channel you have connected the LC100 to.
- On the preview screen, add and move the triangles to match your LC100's configuration.
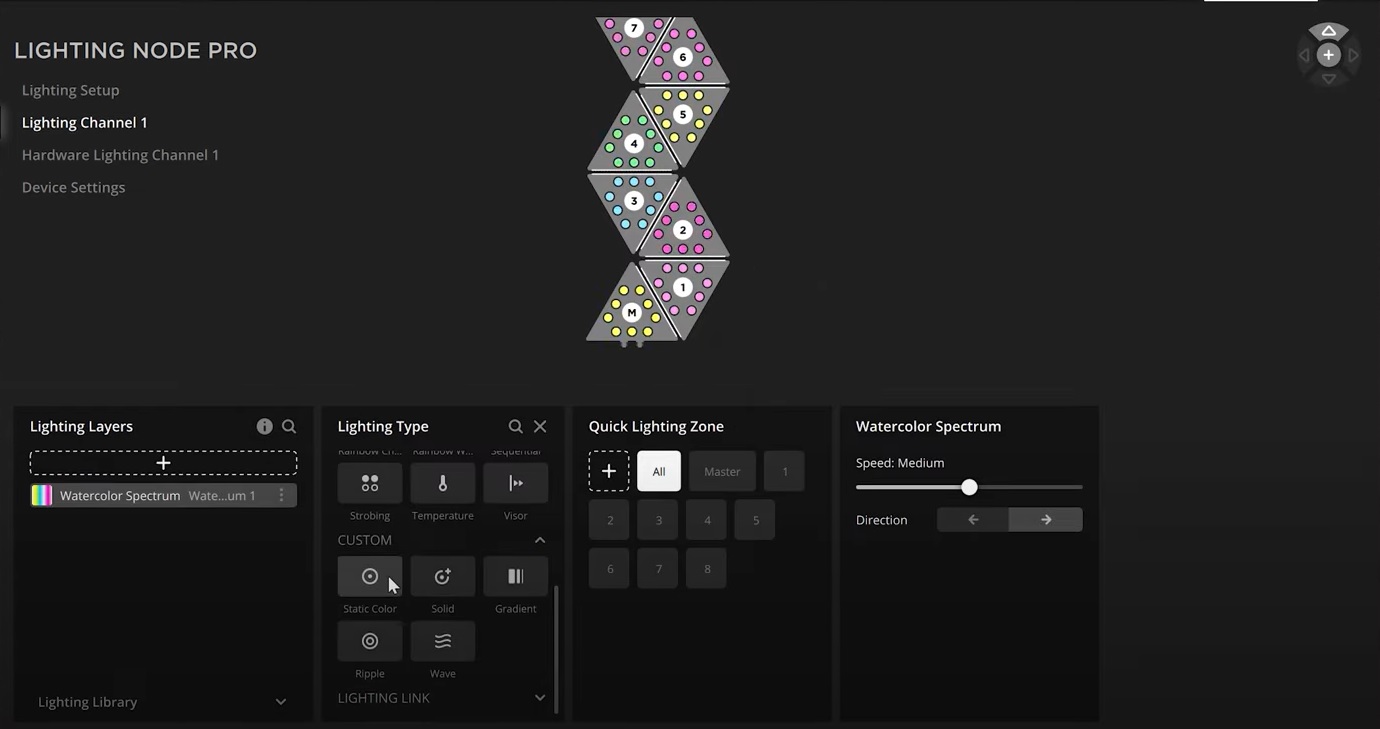
- Select Lighting Channel on the left menu.
- Click the + button in Lighting Layers to create a new lighting layer for your LC100.
- Use the options to customize the lighting effects you want for your LC100.
-
NOTE: If you select a LIGHTING LINK effect, the lighting effect will be applied to all iCUE-compatible devices connected to your PC.
-
NOTE: If you select a LIGHTING LINK effect, the lighting effect will be applied to all iCUE-compatible devices connected to your PC.
Video instructions
RELATED CONTENT


