HOW TO
Jak to zrobić: Instalacja dysku SSD CORSAIR MP600 PRO LPX w konsoli PlayStation 5
Jeśli masz PlayStation 5, możesz skorzystać z tego przewodnika, aby zainstalować w nim dysk SSD CORSAIR MP600 PRO LPX M.2 NVMe.
Before installation...
Before you begin installing your SSD into your PlayStation 5, make sure you do the following:
- Turn on your PlayStation 5 and make sure you update to the latest software version.
- After ensuring it is updated, turn off your PlayStation 5 and disconnect all cables from it.
- Find a soft cloth or towel to lay out on your work surface to protect your PlayStation 5 while you work on installation.
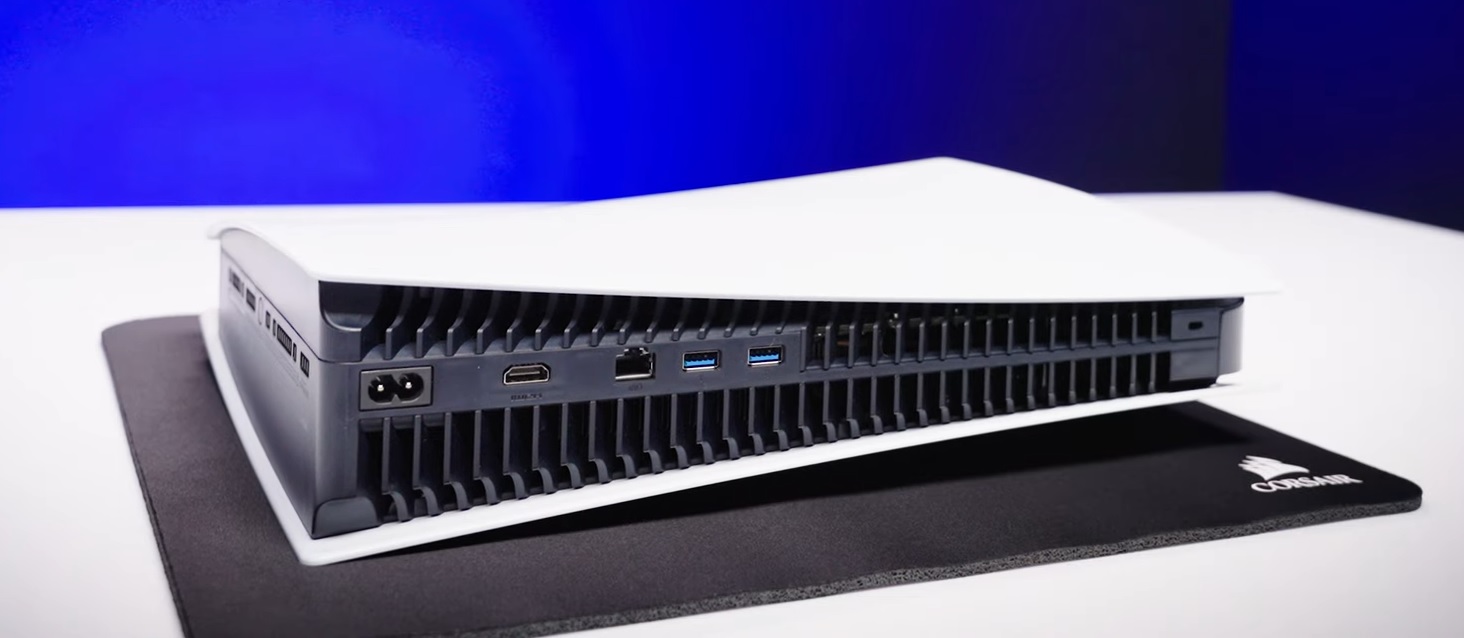
- Lay your PlayStation 5 on its side, making sure that the side with the cutout for the Blu-ray drive is facing up.
Installing your SSD
Once you have ensured your PlayStation 5 is up-to-date, is powered off, and all cables are disconnected, you can begin the installation.
- Gently lift and slide off the side panel of your PlayStation 5 to remove it.
- If you need help removing your PlayStation 5 cover, you can find instructions on this PlayStation webpage.
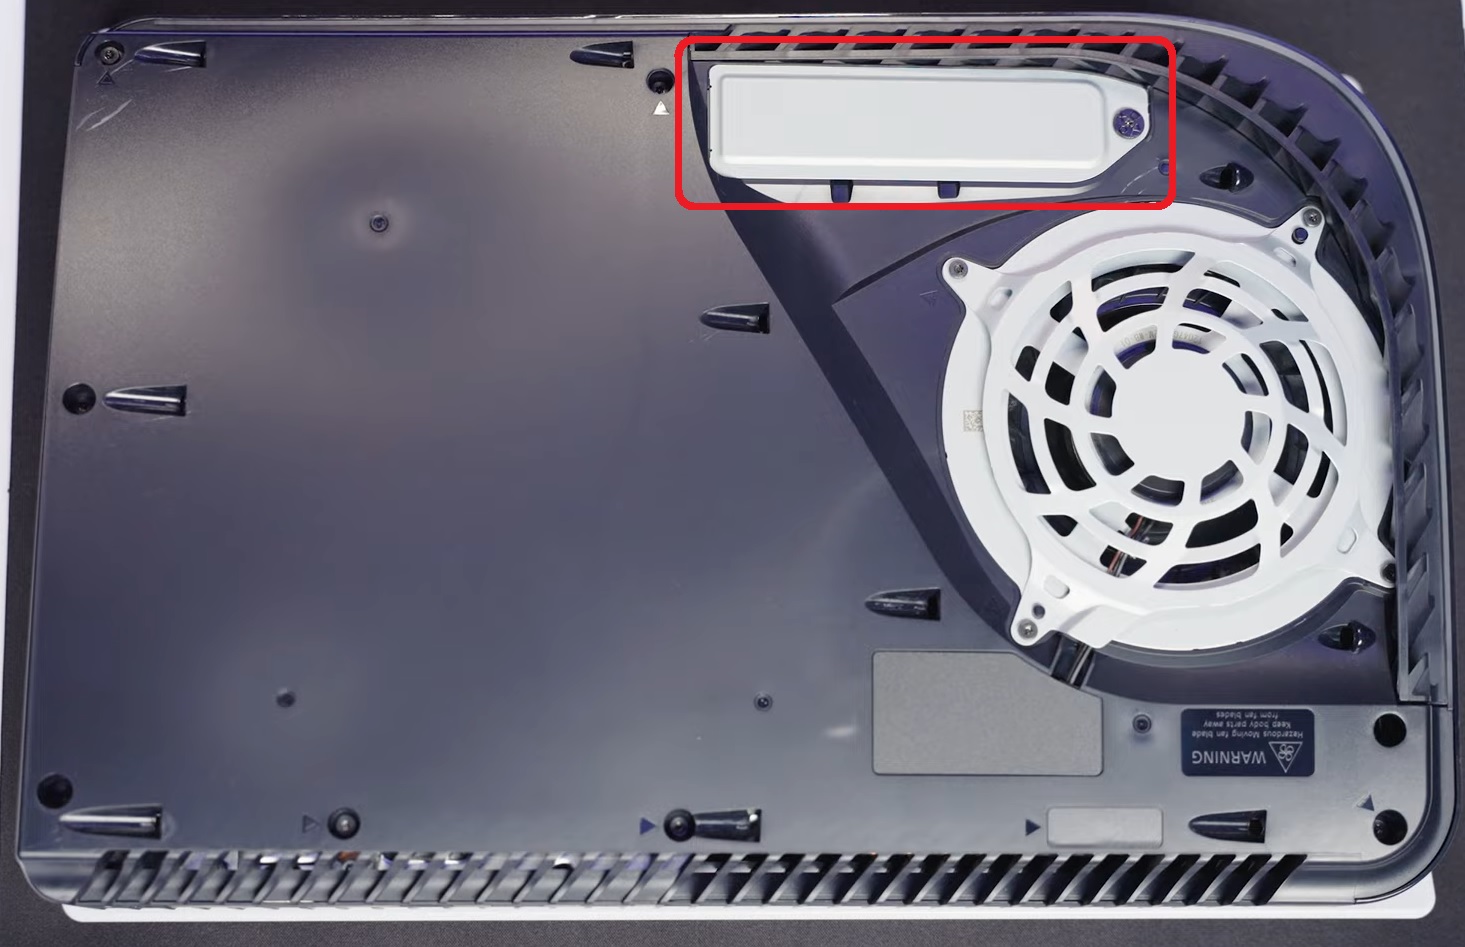
- Use a Phillips head screwdriver to remove the cover M.2 expansion bay.
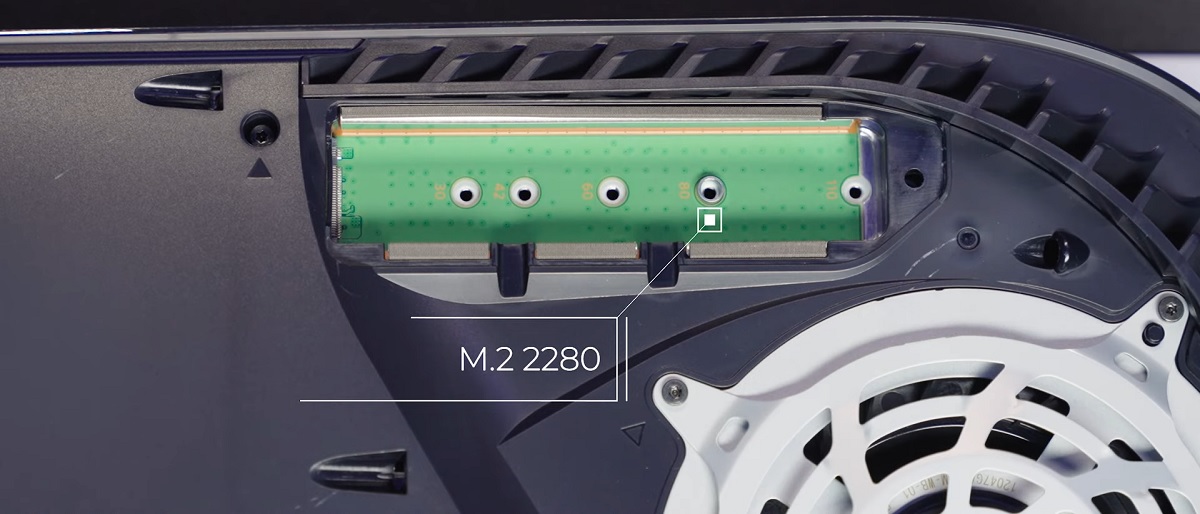
- Use your Phillips head screwdriver to remove the screw securing the standoff in position 110.
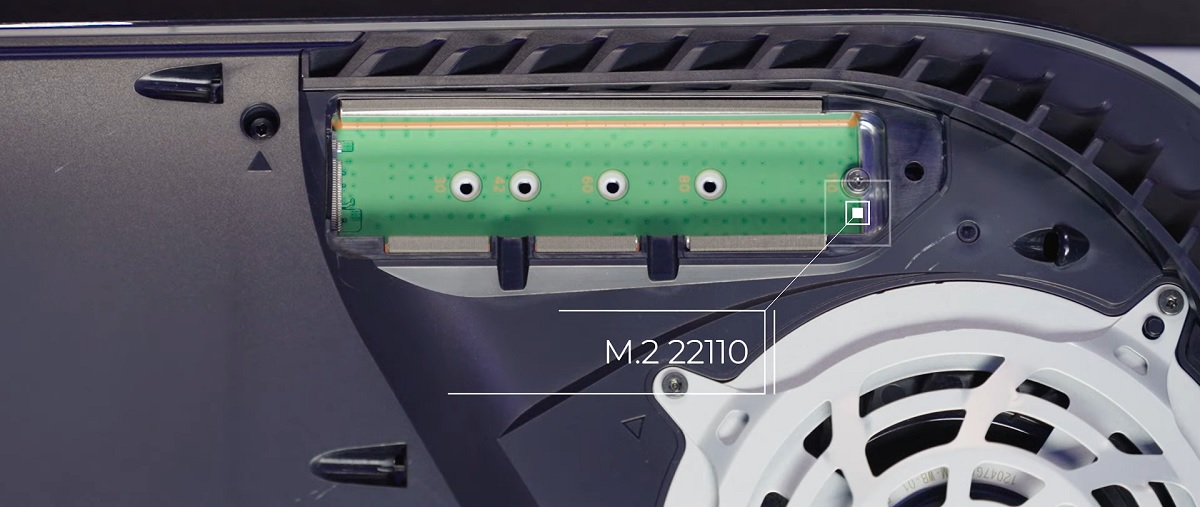
- Place the standoff into the position marked 80.
- Insert your MP600 PRO LPX SSD into the expansion bay, making sure to line up the connector on the SSD into the notch in the expansion bay.
-
- Make sure that the other end of the drive is resting on the standoff in position 80.
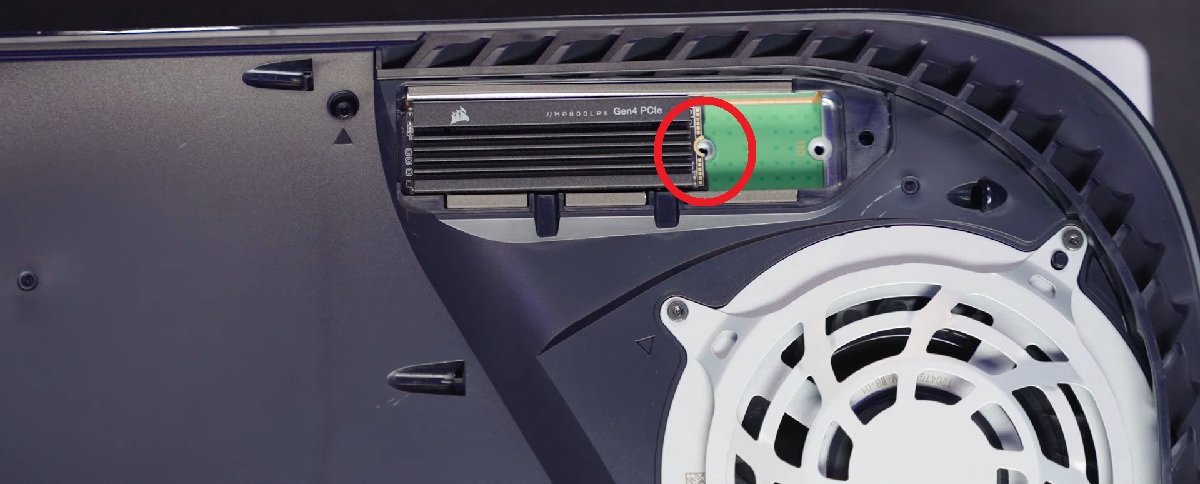
- Make sure that the other end of the drive is resting on the standoff in position 80.
-
- Secure the SSD and standoff in place by using the screw you previously removed.
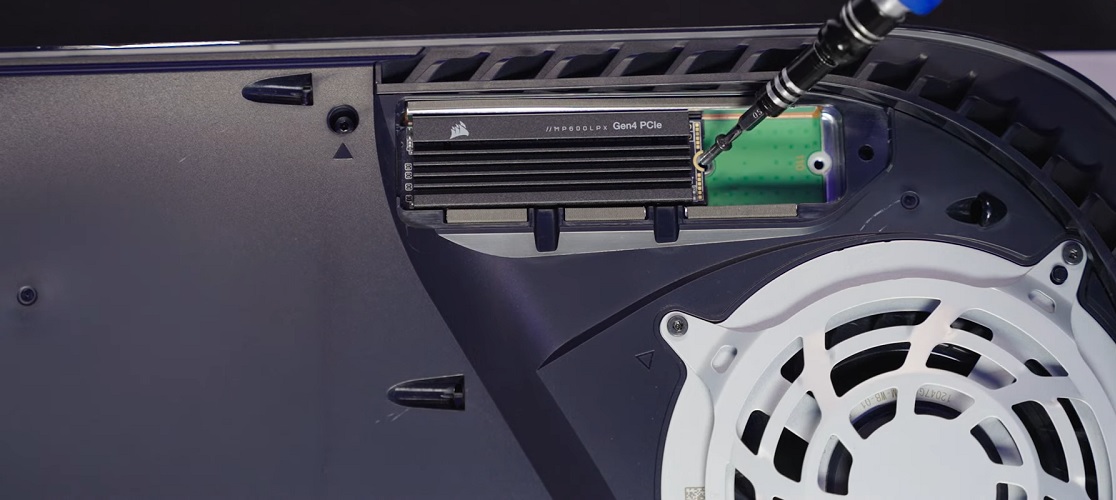
- Reinstall the cover of the M.2 expansion bay.
- Reinstall the side panel of your PlayStation 5.
- Reconnect your PlayStation 5 to power and video, then power it on.
- You should see the M.2 SSD Storage utility; follow the prompts on the screen to format your SSD.
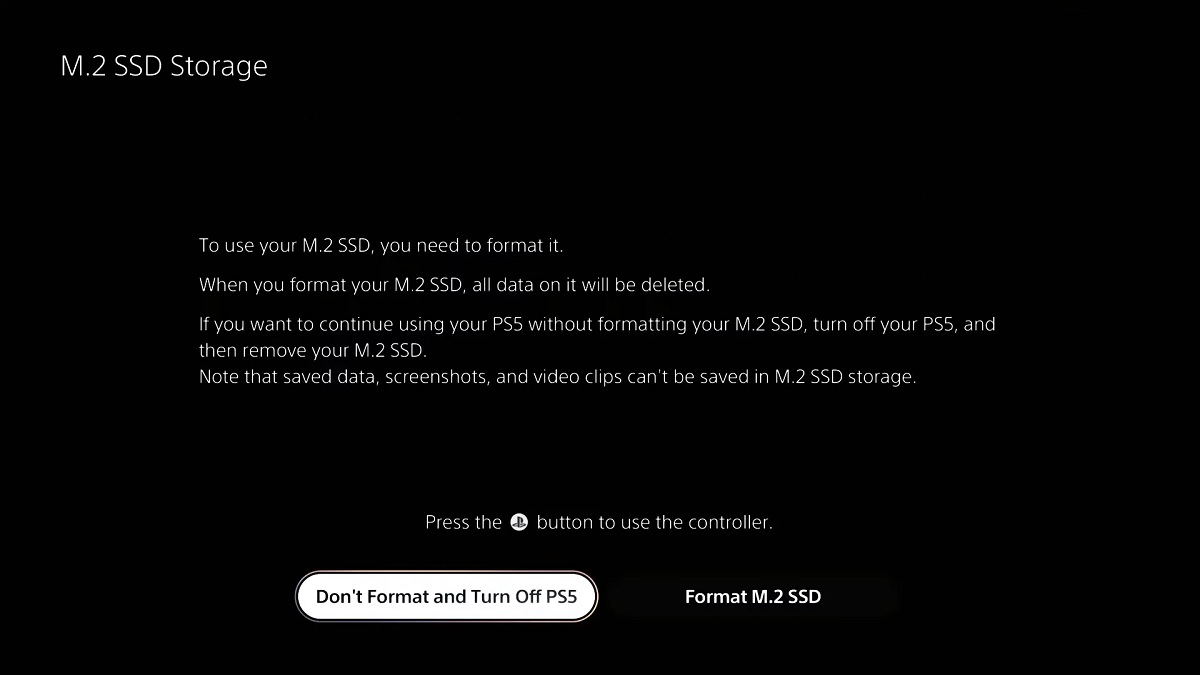
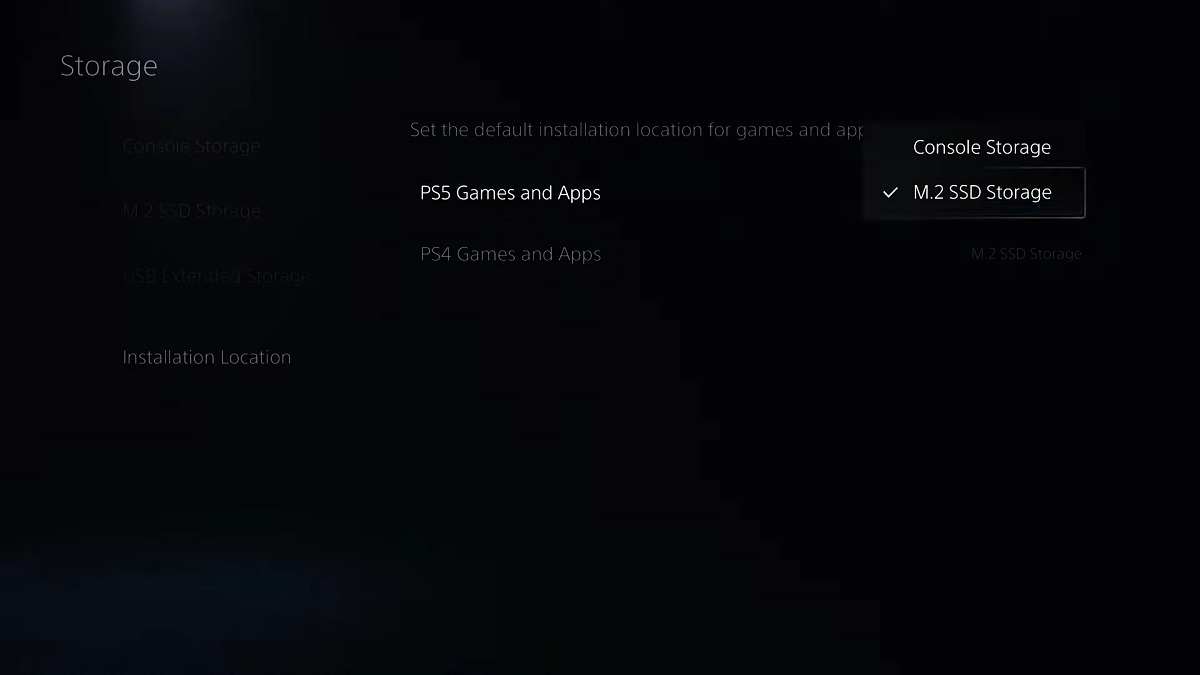
Once your SSD is formatted, you can go to the Storage Manager of your PlayStation 5 and select your M.2 SSD as the default storage location.
