MANUAL | QUICK START GUIDE
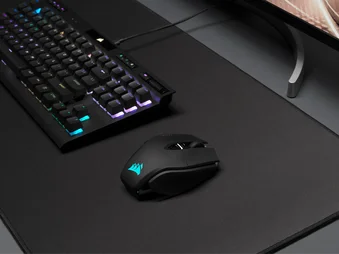
M75 WIRELESS
LIGHTWEIGHT RGB GAMING MOUSE

M75 WIRELESS
GETTING TO KNOW YOUR MOUSE
Please use 2.4 GHz mode or wired mode to configurate on iCUE.

| A. |
LEFT MOUSE BUTTON |
J. |
DPI BUTTON |
| B. |
RIGHT MOUSE BUTTON |
K. |
LEFT FORWARD BUTTON |
| C. |
MIDDLE CLICK/SCROLL WHEEL |
L. |
LEFT BACK BUTTON |
| D. |
RGB INDICATOR |
M. |
RIGHT FORWARD BUTTON |
| E. |
MARKSMAN OPTICAL SENSOR |
N. | RIGHT BACK BUTTON |
| F. |
USB CHARGING/DATA PORT |
O. | USB WIRELESS RECEIVER |
| G. |
100% VIRGIN-GRADE PTFE MOUSE FEET |
P. | USB CHARGING/DATA CABLE |
| H. |
POWER/WIRELESS MODE BUTTON |
Q. | LEFT/RIGHT SIDE BUTTON COVERS |
| I. |
USB WIRELESS RECEIVER STORAGE |
APPLE SPECIAL EDITION
GETTING STARTED
|
1. Download and install iCUE for macOS to control your device’s full range of features. 2. Connect your device and use the POWER/WIRELESS MODE BUTTON (H) under the mouse to select your desired connectivity mode*: |
|
 |
|
| *Wired or 2.4GHz is recommended for the best gaming performance | |
| 3. Always update your device software and firmware to the latest available version. | |
GETTING TO KNOW YOUR MOUSE

| A. |
LEFT MOUSE BUTTON |
J. |
DPI BUTTON |
| B. |
RIGHT MOUSE BUTTON |
K. |
LEFT FORWARD BUTTON |
| C. |
MIDDLE CLICK/SCROLL WHEEL |
L. |
LEFT BACK BUTTON |
| D. |
RGB INDICATOR |
M. |
RIGHT FORWARD BUTTON |
| E. |
MARKSMAN OPTICAL SENSOR |
N. | RIGHT BACK BUTTON |
| F. |
USB CHARGING/DATA PORT |
O. | USB WIRELESS RECEIVER |
| G. |
100% VIRGIN-GRADE PTFE MOUSE FEET |
P. | USB CHARGING/DATA CABLE |
| H. |
POWER/WIRELESS MODE BUTTON |
Q. | LEFT/RIGHT SIDE BUTTON COVERS |
| I. |
USB WIRELESS RECEIVER STORAGE |
R. |
USB ADAPTER |
CHARGING THE MOUSE
IMPORTANT: The M75 WIRELESS gaming mouse must be fully charged before its first use.
Connect the mouse to an available USB 2.0 or 3.X port on your PC with the USB CHARGING/DATA CABLE (P).
The RGB INDICATOR (D) on the mouse will begin pulsing green to denote battery charging and will turn solid green when charging is complete.
SETTING UP 2.4GHz SLIPSTREAM WIRELESS
Hyper-fast sub-1ms wireless connection is designed for no-compromise gaming grade performance.
- Connect the USB WIRELESS RECEIVER (O) to an available USB 2.0 or 3.x port located on the front panel of your PC or nearby USB port.
- Power on your mouse by holding down on the POWER/WIRELESS MODE BUTTON (H) for 5 seconds, or until the RGB INDICATOR (D) lights up.
- The RGB INDICATOR (D) will blink white and turn solid white when connected.
- If the RGB INDICATOR (D) is blue, press the POWER/WIRELESS MODE BUTTON (H) once to swap to 2.4GHz mode.
- Download the iCUE software from https://www.corsair.com/icue.
- Run the installer program and follow instructions for installation.
If reconnection is required, initiate USB receiver pairing via USB cable and reconnect on the iCUE software settings menu.
SETTING UP BLUETOOTH
Bluetooth wireless is best for everyday computing tasks, productivity, and office applications.
- Initiate Bluetooth pairing on your Bluetooth 4.0 or higher enabled device.
- Power on your mouse by holding down on the POWER/WIRELESS MODE BUTTON (H) for 5 seconds, or until the RGB INDICATOR (D) lights up.
- The RGB INDICATOR (D) will blink blue and turn solid blue when connected.
- If the RGB INDICATOR (D) is white, press the POWER/WIRELESS MODE BUTTON (H) once to swap to Bluetooth mode.
- If the BT pairing device needs to be re-paired or changed, switch the BT mode first. Hold down on the POWER/WIRELESS MODE BUTTON (H) until RGB lights turn off. Press and hold DPI BUTTON (J) and POWER/WIRELESS MODE BUTTON (H) to turn on and enter BT Pairing mode, when the blue light blinks. Release DPI BUTTON (J) and POWER/WIRELESS MODE BUTTON (H).
*M75 WIRELESS can only be paired to one device. If you need to pair with another device, please enter re-pairing mode to initialize the pairing process.
Follow the instructions provided to successfully connect your device.

ON-THE-FLY DPI TUNING
M75 WIRELESS has a unique feature that enables you to adjust the current onboard DPI stage setting in 50 DPI increments without the software, so you can jump right into the action while you find the perfect sensitivity setting.
| Function | Shortcut | RGB Indicator |
| Increase DPI by 50 | Hold DPI BUTTON (J) and press LEFT FORWARD BUTTON (K) | Blinks Green |
| Decrease DPI by 50 | Hold DPI BUTTON (J) and press LEFT BACK BUTTON (L) | Blinks Red |
| Reset DPI Stage | Hold DPI BUTTON (J) then both LEFT FORWARD BUTTON (K) and LEFT BACK BUTTON (L) buttons for 2 seconds | Blinks Yellow |
*In left-hand mode, use RIGHT FORWARD BUTTON (M) and RIGHT BACK BUTTON (N) instead.
On-the-fly DPI changes are saved to the onboard memory and can be further adjusted in granular 1 DPI steps in iCUE. If iCUE is running, then changes are saved to the software profile directly.
MOUSE STATUS, DPI SETTINGS, AND INDICATIONS
Wireless connection and battery status are communicated through the RGB INDICATOR (D). M75 WIRELESS comes preloaded with common competitive DPI settings which can be selected by pressing the DPI BUTTON (J) with the RGB INDICATOR (D) backlighting to reflect the current stage.
| Battery Status | RGB Indicator |
| Battery charging | Pulsing Green |
| Battery critical, recharge required | Pulsing Red |
| Battery low, recharge soon | Blinking Red |
| Battery medium | Blinking Amber |
| Battery high | Blinking Green |
| Battery charged | Green |
| Wireless Status | RGB Indicator |
| 2.4GHz wireless mode – pairing | Blinking White |
| 2.4GHz wireless mode – paired | White |
| 2.4GHz wireless mode – pairing failed | Pulsing White |
| BT wireless mode – pairing | Blinking Blue |
| BT wireless mode – paired | Blue |
| BT wireless mode – pairing failed | Pulsing Blue |
| DPI Stage Status | RGB Indicator |
| Stage #1 – 400 DPI | Red |
| Stage #2 – 800 DPI | Orange |
| Stage #3 – 1200 DPI | Yellow |
| Stage #4 – 1600 DPI | Green |
| Stage #5 – 3200 DPI | Blue |
SWAPPING YOUR SIDE BUTTONS
- Push the inner edges of LEFT FORWARD BUTTON (K) and LEFT BACK BUTTON (L) to pivot the buttons out.
- Remove the buttons and replace with LEFT/RIGHT SIDE BUTTON COVERS (Q).
- Do the same for the other side buttons to complete mouse hand change.
The M75 WIRELESS side buttons are set to a right-handed option by default. You can select your hand option using iCUE software and swap the side button functions to your preference.
Hand swap is also available through firmware mode.
Press and hold LEFT FORWARD BUTTON (K) and LEFT BACK BUTTON (L) for 5 seconds until the RGB INDICATOR blinks red lights to change to Left-handed mode.
Press and hold RIGHT FORWARD BUTTON (M) and RIGHT BACK BUTTON (N) for 5 seconds for Right-handed mode.
BATTERY REMOVAL INFORMATION
This product uses a rechargeable battery and safety guidelines must be followed in the event that the product is disabled for disposal and recycling. To safely remove the battery for disposal and recycling, follow the numbered steps with the below diagrams.
CORSAIR MEMORY, Inc. encourages customers to recycle used electronic hardware and rechargeable batteries in accordance with local laws and regulations.
- Remove Front and Rear Footpads
- Remove x4 Screws
- Remove Top Cover Assembly
- Unplug Daughter Board Connector
- Unplug Battery Connector
- Remove Battery


The power delivered by the charger must be between min 2 Watts required by the radio equipment, and max 5 Watts in order to achieve the maximum charging speed.
COPYRIGHT/LEGAL INFORMATION
© 2024 CORSAIR MEMORY, Inc. All rights reserved. CORSAIR and the sails logo are registered trademarks of CORSAIR in the United States and/or other countries. All other trademarks are the property of their respective owners. Product may vary slightly from those pictured.
FCC ID: 2AAFMRGP0158 (Mouse)
FCC ID: 2AAFMRGP0146 (Dongle)
IC: 10954A-RGP0158 (Mouse)
IC: 10954A-RGP0146 (Dongle)
RELATED CONTENT