Need help installing your iCUE Elite Capellix liquid CPU cooler? We have video and written instructions to help you out. These instructions are applicable to Intel sockets.
You can also find a PDF of the instruction manual here.
Video instructions
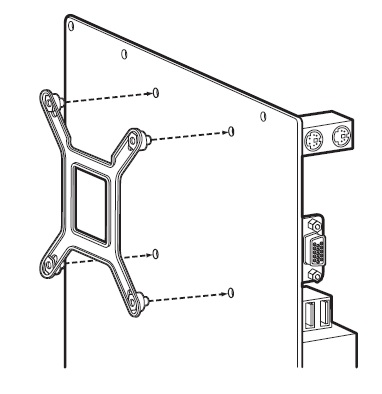
Step 1: Prepare the motherboard socket
If you have an LGA 11XX / 12XX socket, you will need to install the included Intel backplate and LGA 11XX / 12XX standoffs.
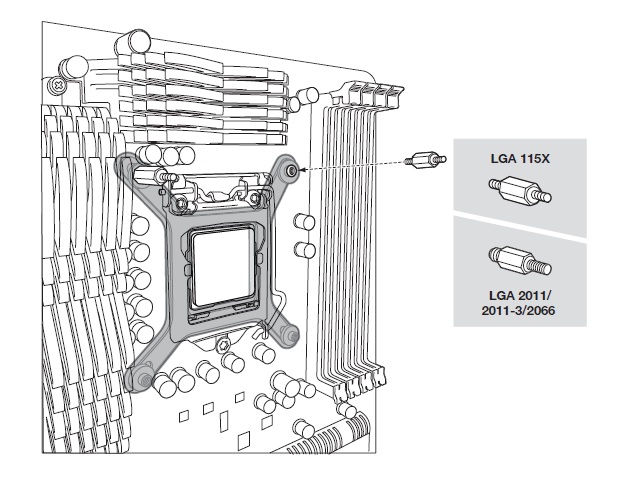
If you have an LGA 2011, 2011-3, or 2066 socket, you do not need to install a backplate. All you need to do is install the appropriate standoffs.
To prepare your motherboard socket:
- Install the Intel backplate if your motherboard requires it.
- Install the 4 Intel standoff screws into your motherboard. Make sure all 4 screws are tightened until secure.
Step 2: Install the cooler
Once you have the standoffs installed on your motherboard, it is time to install the cooler.
NOTE: Your cooler pump head should have thermal paste already applied. If you want to use your own thermal paste, make sure you thoroughly clean the cold plate of the pump head and the integrated heat spreader (IHS) of your processor with isopropyl alcohol and lint-free cloth.
- Install the fans and radiator assembly in your PC system.
- Use the included washers when securing screws outside of your PC case.
- Align the brackets of the pump head with the four standoff screws on your motherboard.
- Tighten the thumbscrews of the standoffs until the pump head is secure.
- Connect the pump tach cable to the CPU_FAN header of your motherboard.
- You should also rout the cables from the pump head to the back of your system.
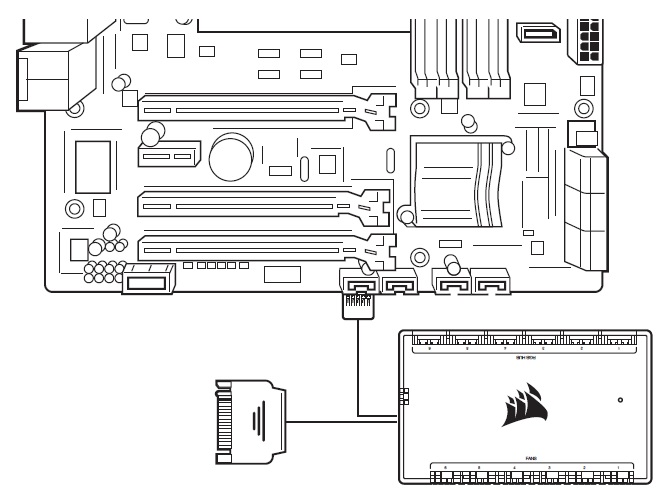
Step 3: Connect the fans and pump to the iCUE Commander CORE
Once your cooler is installed to your motherboard, it is time to connect the fans and pump to the iCUE Commander CORE.
- Find a suitable place on your system where the iCUE Commander CORE can be mounted.
- Mount your Commander CORE using the double-sided tape.
- Connect the Elite Capellix’s 24-pin cable to the appropriate port on your Commander CORE.
- Connect the PWM and LED cables of your fans to the Commander CORE.
-
NOTE: The Commander CORE can support up to 6 CORSAIR PWM RGB fans.
- Connect the Commander CORE USB cable to an available USB 2.0 header on your motherboard.
- Connect the pump power cable to a SATA power plug from your power supply.