Need help setting up the iCUE Nexus in iCUE 4? We have a video and guide to lend you a hand.
NOTE: Make sure you have iCUE version 4.9.338 or newer.
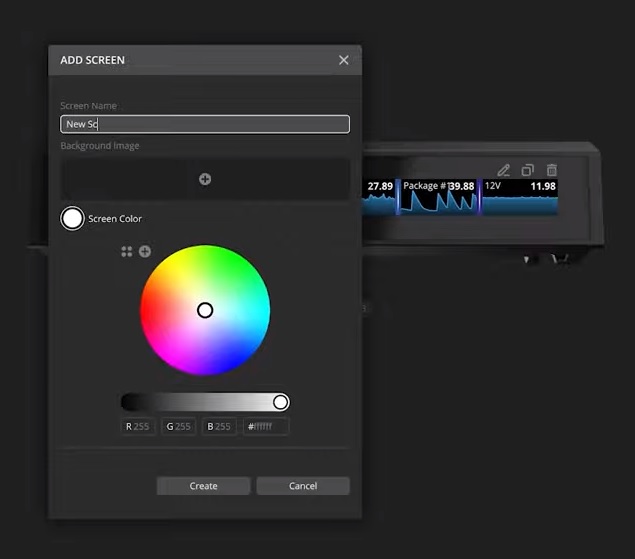
You can use iCUE to add new screens, edit existing screens, or delete unwanted screens in your iCUE Nexus. To do so:
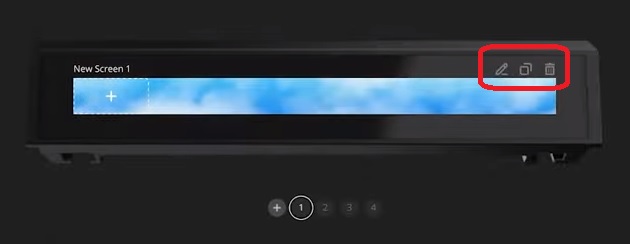
You can import screens created by other people or export screens to share with your friends by clicking Import / Export Screens.
You can use iCUE to create buttons or widgets in your iCUE Nexus.
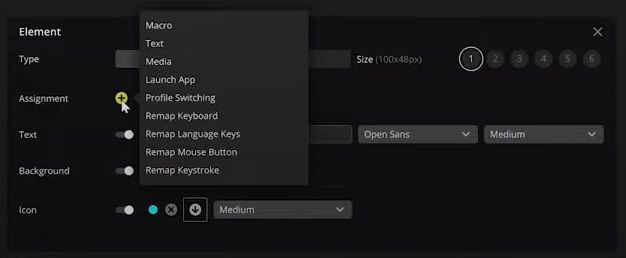
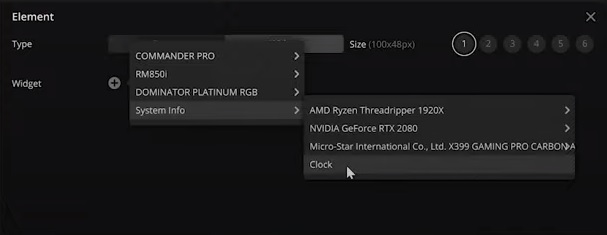
Buttons allow you to perform an action by touching your iCUE Nexus, such as remapping keyboards and mice, performing a macro, launching an app, and more. Widgets provide you a system readout on your Nexus, such as fan or pump speed, your system temperature, power usage, system clocks, and more.
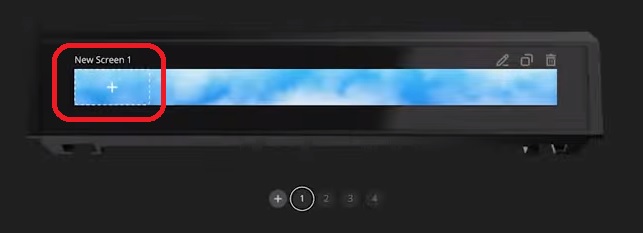
To create a new button or widget, click the + button on the left side of the Nexus preview.
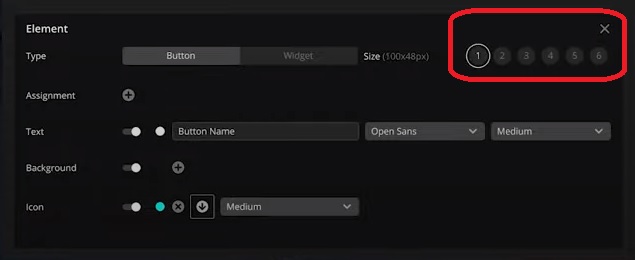
You can edit a button or widget by clicking its assigned number on the upper right of the Element section. If you want to delete the button, click the X button on the upper right.
If you are creating a button:
If you are creating a widget:
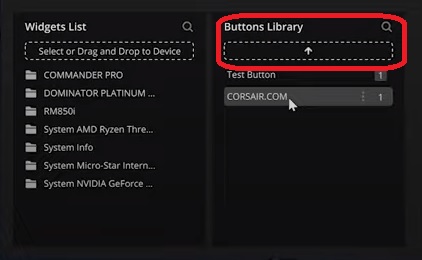
You can use the library to store your created buttons and widgets. With the library, you can simply drag and drop your saved buttons and widgets to import them into different Nexus screens.
You can open the library by clicking Libraries in the left menu. Once the library is open, you can drag your buttons or widgets from the iCUE Nexus preview into the library to save them.
To import saved buttons or widgets onto your current iCUE Nexus screen, you drag the button or widget from the library and drop them into the preview, or you can click the up arrow button to add it to your screen.
Clicking Device settings in the left menu opens up the iCUE Nexus settings window. Here, you can update the device firmware or change the brightness of your Nexus.


