INTRODUCTION
La configuration du produit, les informations utilisateur et la politique de garantie/pixel mort sont disponibles sur https://qsg.corsair.com/xeneon-monitors
PRÉCAUTIONS
CONTENU DE L’EMBALLAGE

ÉLÉMENTS DE L’ÉCRAN CORSAIR XENEON FLEX 45WQHD240 OLED
A. Écran OLED CORSAIR XENEON FLEX 45WQHD240
B. Socle
C. Adaptateur secteur
D. Câble d'alimentation secteur
E. Câble DisplayPort (1,5 m)
F. Câble HDMI (1,5 m)
G. Câble USB-C (1,5 m)
H. Câble USB-A vers USB-C (1,8 m)
ASSEMBLAGE

1. Retirez le ruban adhésif supérieur et ouvrez la boîte.
2. Sortez les accessoires du support de base du moniteur.
3. Retirez la couche supérieure en PSE et la plaque de protection en PSE.
4. Retirez les 4 boucles et le carton extérieur.
5. Sortez lentement le moniteur de son emballage.
6. Fixez le support de base du moniteur en serrant les vis. Placez le moniteur horizontalement et terminez l'assemblage.
INCURVATION ET INCLINAISON

Votre moniteur OLED CORSAIR XENEON FLEX 45WQHD240 peut être courbé entre FLAT et 800R à l'aide des poignées latérales situées de chaque côté du moniteur. Les poignées latérales peuvent être déployées en appuyant sur le bouton de chaque poignée et en tirant les poignées jusqu'à ce qu'elles se verrouillent en place avec un clic.
Prenez une poignée dans chaque main, en veillant à ne pas toucher le panneau OLED du pouce ou de la main.
Courbez le panneau vers vous dans un mouvement lent et fluide. Le mécanisme d’incurvation émettra un clic quand il atteindra sa portée maximale (~800R) et également quand il revient complètement à PLAT.
Votre moniteur OLED CORSAIR XENEON FLEX 45WQHD240 est doté d'un support robuste et élégant qui permet de régler l'inclinaison. Vous pouvez utiliser la poignée centrale avant et inférieure pour incliner le panneau. Selon la surface de votre bureau, vous trouverez peut-être utile d'exercer une pression sur la base ou sur l'une des poignées latérales pour empêcher l'écran de glisser pendant l'inclinaison.


CONNECTIVITÉ
AVANT

ARRIÈRE

FONCTIONNEMENT
CONTRÔLES

Votre moniteur comprend une manette sur la face avant pour ouvrir des raccourcis et naviguer dans les paramètres d'affichage.
AFFICHAGE À L’ÉCRAN (OSD)
En pressant le joystick vers l’intérieur, vous pouvez accéder aux paramètres d’affichage de votre moniteur. Vous pouvez utiliser le joystick pour parcourir les paramètres et presser le joystick vers l’intérieur vous permettra de confirmer votre sélection.
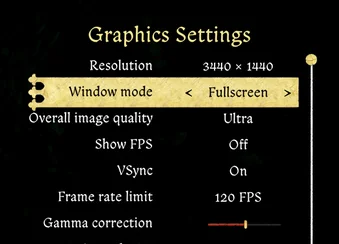
OSD – IMAGE
Le premier menu, nommé « Image », contient les paramètres suivants pour ajuster la qualité d’image globale.
| NIVEAU 1 | NIVEAU 2 | NIVEAU 3 | NIVEAU 4 | FONCTIONNALITÉ |
| Image | Préréglé | Standard | Sélectionne un affichage préréglé calibré en usine pour une utilisation générale et une meilleure économie d'énergie | |
| Film | Sélectionne un préréglage d'affichage optimisé pour regarder des films | |||
| Texte | Sélectionne un préréglage d'affichage optimisé pour la lecture de texte | |||
| sRVB | Sélectionne un préréglage d'affichage optimisé pour le contenu HDR dans l'espace colorimétrique sRGB | |||
| Créatif | Sélectionne un affichage prédéfini et calibré en usine pour les tâches de création de contenu | |||
| Jeu | Sélectionne un préréglage d'affichage optimisé pour les jeux rapides | |||
| HDR | Affiche HDR lorsque le mode HDR est sélectionné dans les paramètres d'affichage du système d'exploitation. | |||
| Luminosité | (0-100) | Règle l'intensité du rétroéclairage de l'écran | ||
| Contraste | (0-100) | Règle le contraste de l'écran | ||
| Netteté | (0-10) | Ajuste le filtre de netteté de l'écran, augmentant ainsi les détails des contours | ||
| Température de couleur |
Par défaut |
Règle la température de couleur de l'écran sur la valeur par défaut, 8500K | ||
| Standard | Règle la température de couleur de l'écran sur la norme, 6500K | |||
| Chaud | Règle la température de couleur de l'écran sur chaude, 5000K | |||
| Personnalisé | R (0-100) | Permet de régler manuellement la température de couleur de l'écran à l'aide de curseurs contrôlant les niveaux de rouge, de bleu et de vert. | ||
| G (0-100) | ||||
| B (0-100) | ||||
| Gamma | 2 | Ajuste la luminance perçue ; la valeur par défaut est 2,2. | ||
| 2.2 | ||||
| 2.4 | ||||
| Saturation | (0-10) | Règle le niveau de saturation ; la valeur par défaut est 0 | ||
| Actualiser la superposition | OFF | Bascule une superposition dans le coin supérieur droit qui affiche le taux de rafraîchissement actuel du moniteur, utile pour suivre les images par seconde lorsque la synchronisation adaptative est activée | ||
| SUR | ||||
| Réticule | OFF | Activer la fonction Réticule | ||
| Point | ||||
| Croix | ||||
| Angle | ||||
| Couleur du réticule | Vert | Changer la couleur du réticule | ||
| Rouge |
OSD – PIP/PBP (PICTURE-IN-PICTURE / PICTURE-BY-PICTURE)
Le deuxième menu, nommé « PIP/PBP », vous permet d’activer les fonctionnalités PIP/PBP et de les afficher de différentes manières.

| NIVEAU 1 | NIVEAU 2 | NIVEAU 3 | NIVEAU 4 | FONCTIONNALITÉ |
| PIP/PBP | Mode Fonction | OFF | Activer la fonction PIP ou PBP | |
| PIP | ||||
| PBP | ||||
| Position PIP | En haut à gauche | Placer la source d'entrée secondaire en haut à gauche | ||
| En haut à droite | Placer la source d'entrée secondaire en haut à droite | |||
| En bas à gauche | Placer la source d'entrée secondaire en bas à gauche | |||
| En bas à droite | Placer la source d'entrée secondaire en bas à droite | |||
| Source d'entrée secondaire | HDMI 1 | Sélectionner la source d'entrée secondaire | ||
| HDMI 2 | ||||
| Port d'affichage | ||||
| Type C | ||||
| Échange de la source vidéo | Permute la source vidéo entre l'image principale et l'image secondaire | |||
| Changer la source audio | Source principale | Changer la source audio entre la source principale et la source secondaire | ||
| Source secondaire |
OSD – RÉGLAGE OSD
Le troisième menu, nommé « Paramètres OSD », contient les paramètres suivants pour ajuster les paramètres internes de l’écran.

| NIVEAU 1 | NIVEAU 2 | NIVEAU 3 | NIVEAU 4 | FONCTIONNALITÉ |
| Réglage OSD | Langue | 繁體中文 | Sélectionne la langue de l'OSD | |
| Anglais | ||||
| English | ||||
| Allemand | ||||
| Italiano | ||||
| 日本語 | ||||
| Coréen | ||||
| Portugais | ||||
| Español | ||||
| Transparence | OFF | Règle l'OSD sur transparent ou opaque | ||
| SUR | ||||
| Temps mort | (10-60) | Règle la durée (en secondes) pendant laquelle l'OSD reste à l'écran avant de disparaître |
OSD – PARAMÈTRES DU SYSTÈME
Le quatrième menu, nommé « Paramètres système », vous permet de régler les paramètres du système.

| NIVEAU 1 | NIVEAU 2 | NIVEAU 3 | NIVEAU 4 | FONCTIONNALITÉ |
| Paramétrage du système | Rapport d'aspect | Auto |
Le rapport d'aspect est le rapport entre la largeur et la hauteur d'une image ou d'un écran. Lorsque le rapport d'aspect est réglé sur Auto, le moniteur adapte le rapport d'aspect au signal vidéo entrant. Ce mode est utile pour essayer de visualiser une image avec un rapport d'aspect différent de celui de l'écran sans déformer l'image. Le mode Plein écran prend l'entrée et modifie la taille de l'image pour l'adapter à l'écran. |
|
| Complet | ||||
| Synchronisation adaptative | OFF |
Permet à AMD FreeSync ou NVIDIA G-SYNC de réduire les déchirures et les saccades de l'écran en synchronisant le taux de rafraîchissement du moniteur avec la fréquence d'images du processeur graphique. Une fois activé, vous pourrez sélectionner AMD FreeSync ou NVIDIA G-SYNC dans le pilote graphique. La compatibilité NVIDIA G-Sync est disponible lorsqu'elle est connectée via un câble DP ou un câble USB Type-C Alt Mode à un GPU compatible. Pour la fonctionnalité NVIDIA G-Sync : • Installez/ouvrez le panneau de configuration NVIDIA Un redémarrage du système peut être nécessaire pour accéder aux paramètres NVIDIA. |
||
| SUR | ||||
| Maintien de l'image Actualiser | Démarrer Actualiser |
Rafraîchit les pixels pour éviter la rétention d'image ou le « burn-in ». Si l'écran reste allumé pendant 8 heures, une notification s'affiche à l'écran pour suggérer d'effectuer un rafraîchissement de rétention d'image. Pendant le rafraîchissement de l'écran, le moniteur ne peut pas être utilisé. Lorsque le moniteur est éteint, le rafraîchissement de la rétention d'image s'exécute automatiquement s'il a fonctionné pendant plus de 8 heures. Appuyer sur le bouton d'alimentation pendant un rafraîchissement annule le processus et permet d'utiliser l'écran. Pour assurer la longévité du moniteur, il est recommandé de l'éteindre lorsqu'il n'est pas utilisé et d'utiliser le rafraîchissement de la rétention d'image pendant les longues périodes d'utilisation continue. |
||
| Orbit | OFF |
Lorsqu'il est activé, l'image se décale d'un pixel par minute selon un motif circulaire pour éviter d'endommager l'écran et de conserver l'image. Pour garantir la longévité du moniteur, il est recommandé de toujours laisser le paramètre Orbit activé, en particulier lorsque le moniteur est utilisé pour des tâches de productivité et de travail ou pour des images fixes. |
||
| SUR | ||||
| Stabilisateur de luminosité | OFF |
Limite la luminosité maximale du moniteur à 200 nits tout en offrant des niveaux de luminosité plus stables lors du passage d'une fenêtre ou d'une application à l'autre. Pour profiter pleinement des capacités de luminosité et de contraste offertes par ce moniteur, réglez le stabilisateur de luminosité sur OFF ; idéal pour le HDR, les jeux et la consommation de médias. Pour garantir des paramètres de luminosité stables pour les tâches de productivité, réglez le stabilisateur de luminosité sur ON. |
||
| SUR | ||||
| Détection de la source | Auto |
Permet à l'utilisateur de choisir si le moniteur doit détecter automatiquement une source vidéo ou de sélectionner manuellement la source vidéo. Auto doit être sélectionné lorsqu'il n'y a qu'un seul périphérique d'entrée vidéo, et Manuel doit être sélectionné lorsqu'une entrée vidéo spécifique est souhaitée, mais qu'il existe plusieurs entrées vidéo. |
||
| Manuel | ||||
| Mode Alt USB-C | 4 voies |
Permet à l'utilisateur de choisir entre différentes vitesses de transfert de données USB, mais peut affecter la fréquence de rafraîchissement de l'écran.
• Le mode 4 voies permet une résolution allant jusqu'à 3440 x 1440 à 240 Hz, mais réduit la vitesse des ports USB de type A à USB 2.0
Pour profiter pleinement des taux de rafraîchissement élevés, veuillez régler le mode alternatif USB-C sur 4 voies ; idéal pour les jeux. Pour profiter de vitesses de transfert de données USB plus rapides, veuillez régler le mode alternatif USB-C sur 2 voies ; idéal pour les tâches de productivité et les transferts de données. |
||
| 2 voies | ||||
| Réinitialisation des paramètres d'usine | OFF |
Lorsqu'elle est appliquée, Factory Reset rétablit les paramètres d'usine par défaut du moniteur. Tous les paramètres précédemment appliqués seront réinitialisés aux paramètres par défaut. |
OSD – AUDIO
Le cinquième menu, nommé « Audio », vous permet de contrôler le volume audio de l’écran. Le signal audio est transmis par le signal d’entrée vidéo actuellement actif.

| NIVEAU 1 | NIVEAU 2 | NIVEAU 3 | NIVEAU 4 | FONCTIONNALITÉ |
| Audio | Volume | (0-100) | Règle le volume de la sortie audio de la prise casque |
OSD – SOURCE D'ENTRÉE
Le sixième menu, nommé « Sources d’entrée », vous permet de passer de l’une à l’autre des entrées de l’écran.

| NIVEAU 1 | NIVEAU 2 | NIVEAU 3 | NIVEAU 4 | FONCTIONNALITÉ |
| Source d'entrée | HDMI 1 | Commute vers le périphérique connecté au port HDMI-1 | ||
| HDMI 2 | Commute vers le périphérique connecté au port HDMI-2 | |||
| DisplayPort | Bascule vers le périphérique connecté au port DisplayPort « DP » | |||
| Type C | Commute vers le périphérique connecté au port TYPE-C |
OSD – INFORMATION
Le septième menu, intitulé « Information », vous fournit des informations système sur l'écran.

| NIVEAU 1 | NIVEAU 2 | NIVEAU 3 | NIVEAU 4 | FONCTIONNALITÉ |
| Informations | Source | Afficher la source d'entrée actuelle | ||
| Résolution | Afficher la résolution d'affichage actuelle | |||
| Actualiser la superposition | Afficher le taux de rafraîchissement actuel | |||
| Synchronisation adaptative | État de la synchronisation adaptative | |||
| HDR | Statut de la HDR | |||
| Version FW | Affiche la version actuelle du micrologiciel |
ANNEXE
TABLEAU 1: CARACTÉRISTIQUES TECHNIQUES
| Nom du produit |
CORSAIR XENEON FLEX 45WQHD240 OLED
|
| Numéro de pièce | CM-9030001 |
| Appareil | RDD0022 |
| ID du concentrateur USB | Hub CORSAIR USB 3.1 |
| Taille du panneau | 114,3 cm Diagonale |
| Surface d'affichage | Non-éblouissant |
| Pixels par pouce | 83 |
| Rapport d'aspect | 21:9 |
| Résolution native | 3440 x 1440 à 240 Hz |
| Temps de réponse (GtG) | 0,03 ms |
| Couleurs d'affichage | 1,07 milliard de couleurs (RVB 10 bits) |
| Technologie des panneaux | OLED |
| Sans scintillement | Oui |
| Angles de vision | 178° (H) / 178° (V) |
| Luminosité maximale |
25 % APL : 450 cd/m2 100 % APL : 150 cd/m2 |
| Rapport de contraste statique | 1 500 000:1 |
| HDR | HDR avec luminosité de crête de 1000 nits |
| Gamme de couleurs (CIE 1976) | 98,5 % (DCI-P3), 100 % (sRGB) |
| Fréquence de rafraîchissement variable |
Certifié compatible NVIDIA G-Sync Certifié AMD FreeSync |
| Entrée HDMI | 2x HDMI 2.1 |
| Entrée DisplayPort | 1x DisplayPort 1.4 |
| Entrée USB-C | 1x DisplayPort 1.4 (USB-C Alt Mode), 30W Power Delivery, USB 5Gbps Data Upstream |
| Entrée amont USB-C | 1 port USB-C 5 Gbit/s avec une puissance de sortie maximale de 15 W |
| Sortie USB-A | 4 ports USB 5 Gbit/s de type A Type A 3.1 gen1 |
| Audio 3,5 mm | Oui, transmission à partir de l'entrée vidéo |
| Consommation électrique (en marche) | 60,27 W |
| Consommation électrique (veille) | <0,5 W |
| Consommation électrique (éteint) | <0,3 W |
| Compatibilité VESA | N/A |
| Dimensions (L x H x P), mode à plat | 1 065,6 mm x 574,9 mm x 304,6 mm |
| Dimensions (L x H x P), mode incurvé | 994,3 mm x 574,9 mm x 353,7 mm |
| Poids | 15,5 kg |
| Inclinaison du stand | -7/+15 degrés |
| Adaptateur secteur | 240 W |
| Remarque : votre appareil utilise l'alimentation électrique suivante : Delta ELECTRONICS. Inc. / ADP-240EB D |
TABLEAU 2: MODES D’AFFICHAGE PRIS EN CHARGE
| Résolution | Fréquence de rafraîchissement | HDMI | DP/Type-C | PIP/PBP (HDMI) | PIP/PBP (DP/Type-C) | |
| 640x480 | VGA | 60 Hz | V | V | V | V |
| 67 Hz | V | V | V | V | ||
| 72 Hz | V | |||||
| 75 Hz | V | |||||
| 720x400 | Mode Dos | 70 Hz | V | V | V | V |
| 800x600 | SVGA | 56 Hz | V | V | V | V |
| 60 Hz | V | V | V | V | ||
| 72 Hz | V | V | V | V | ||
| 75 Hz | V | V | V | V | ||
| 832 x 624 | MAC | 75 Hz | V | V | ||
| 1024x768 | XGA | 60 Hz | V | V | V | |
| 70 Hz | V | |||||
| 75 Hz | V | V | V | V | ||
| 1152x864 | VESA | 75 Hz | V | V | V | V |
| 1152x870 | XGA+ | 75 Hz | V | V | V | V |
| 1280x720 | WXGA | 60 Hz | V | V | V | V |
| 1280x800 | WXGA | 60 Hz | V | V | V | |
| 1280x960 | WXGA | 60 Hz | V | V | V | V |
| 1280x1024 | SXGA | 60 Hz | V | V | V | V |
| 75 Hz | V | V | V | V | ||
| 1440x900 | WXGA+ | 60 Hz | V | V | V | V |
| 1680x1050 | WSXGA+ | 60 Hz | V | V | V | V |
| 1920x1080 | FHD | 60 Hz | V | V | V | V |
| 240 Hz | V | V | ||||
| 2560x1440 | QHD | 60 Hz | V | V | ||
| 120 Hz | V | V | ||||
| 240 Hz | V | V | ||||
| 3440x1440 | WQHD | 50 Hz | V | V | ||
| 60 Hz | V | V | V | V | ||
| 100 Hz | V | V | ||||
| 240 Hz | V | V | ||||
| 480P | 640x480p @ 60 Hz 4:3 | V | V | |||
| 720x480p @ 60 Hz 16:9 | V | V | ||||
| 480i | 720x480i @ 60Hz 16:9 | V | V | |||
| 576P | 720x576p @ 50 Hz 16:9 | V | V | |||
| 720P | 1280x720p @ 50 Hz 16:9 | V | V | V | V | |
| 1280x720p @ 60 Hz 16:9 | V | V | V | V | ||
| 1280x720p @ 120 Hz 16:9 | V | V | ||||
| 1080P | 1920x1080p @ 24 Hz 16:9 | V | V | V | ||
| 1920x1080p @ 30 Hz 16:9 | V | V | V | |||
| 1920x1080p @ 50 Hz 16:9 | V | V | V | |||
| 1920x1080p @ 60 Hz 16:9 | V | V | V | V | ||
| 1920x1080p @ 100 Hz 16:9 | V | V | ||||
| 1920x1080p @ 120 Hz 16:9 | V | V | ||||
| 1080i | 1920x1080i @ 50 Hz 16:9 | V | V | V | V | |
| 1920x1080i @ 60 Hz 16:9 | V | V | V | V | ||
| 2160P | 3840x2160p @ 24 Hz 16:9 | V | V | V | ||
| 3840x2160p @ 25 Hz 16:9 | V | V | V | |||
| 3840x2160p @ 30 Hz 16:9 | V | V | V | |||
| 3840x2160p @ 50 Hz 16:9 | V | V | V | |||
| 3840x2160p @ 60 Hz 16:9 | V | V | V | |||
| 3840x2160p @ 100 Hz 16:9 | V | |||||
| 3840x2160p @ 120 Hz 16:9 | V | |||||
À PROPOS DE LA LUMIÈRE BLEUE FAIBLE ET SANS SCINTILLEMENT
** Le moniteur utilise un panneau à faible lumière bleue et est conforme à la solution matérielle à faible lumière bleue de TÜV Rheinland en mode de réinitialisation d'usine/paramètres par défaut (ex. : luminosité 75 %, contraste : 50 %, température de couleur corrélée : normale, mode préréglé : standard).
HDMI MENTIONS LÉGALES
Les termes HDMI, HDMI High-Definition Multimedia Interface, HDMI Trade dress et les logos HDMI sont des marques commerciales ou des marques déposées de HDMI Licensing Administrator, Inc.