MANUAL | QUICK START GUIDE
M75
FPS LIGHTWEIGHT GAMING MOUSE

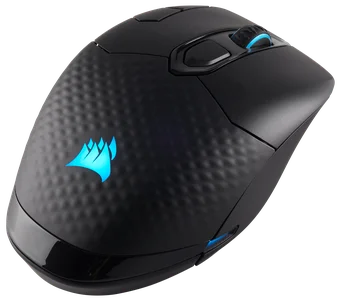
GETTING TO KNOW YOUR MOUSE

- LEFT MOUSE BUTTON
- RIGHT MOUSE BUTTON
- MIDDLE CLICK/SCROLL WHEEL
- RGB INDICATOR
- MARKSMAN OPTICAL SENSOR
- 100% VIRGIN-GRADE PTFE MOUSE FEET
- DPI BUTTON
- LEFT FORWARD BUTTON
- LEFT BACK BUTTON
- RIGHT FORWARD BUTTON
- RIGHT BACK BUTTON
- LEFT/RIGHT SIDE BUTTON COVERS
SETTING UP YOUR MOUSE
- Turn on your computer and connect the mouse to available USB 2.0 or USB 3.X port on your computer.
- Download CORSAIR iCUE software from www.corsair.com/downloads.
- Run the installer program and follow instructions for installation.
SWAPPING YOUR SIDE BUTTONS
The M75 side buttons are set to a right-handed option by default. You can select your hand option using iCUE software and swap the side button functions to your preference.
- Push the inner edges of LEFT FORWARD BUTTON (H) and LEFT BACK BUTTON (I) to pivot the buttons out.
- Remove the buttons and replace with LEFT/RIGHT SIDE BUTTON COVERS (L).
- Do the same for the other side buttons to complete mouse hand change.
Hand swap is also available through firmware mode.
Press and hold LEFT FORWARD BUTTON (H) and LEFT BACK BUTTON (I) for 5 seconds until the RGB INDICATOR blinks red lights to change to Left-handed mode.
Press and hold RIGHT FORWARD BUTTON (J) and RIGHT BACK BUTTON (K) for 5 seconds for Right-handed mode.
ON-THE-FLY DPI TUNING
M75 has a unique feature where you can adjust the current onboard DPI stage setting in 50 DPI increments without the software, so you can jump right into the action while you find the perfect sensitivity setting.
| Function | Shortcut | RGB Indicator |
| Increase DPI by 50 | Hold DPI BUTTON (G) and press LEFT FORWARD BUTTON (H) | Blinks Green |
| Decrease DPI by 50 | Hold DPI BUTTON (G) and press LEFT BACK BUTTON (I) | Blinks Red |
| Reset DPI Stage | Hold DPI BUTTON (G) then both LEFT FORWARD BUTTON (H) and LEFT BACK BUTTON (I) buttons for 2 seconds | Blinks Yellow |
*In left-hand mode, use RIGHT FORWARD BUTTON (J) and RIGHT BACK BUTTON (K) instead.
On-the-fly DPI changes are saved to the onboard memory and can be further adjusted in granular 1 DPI steps in iCUE. If iCUE is running, then changes are saved to the software profile directly.
DPI SETTINGS AND INDICATIONS
M75 comes preloaded with common competitive DPI settings which can be selected by pressing the DPI BUTTON (G) with the RGB INDICATOR (D) backlighting to reflect the current stage.
| DPI Stage Status | RGB Indicator |
| Stage #1 – 400 DPI | Red |
| Stage #2 – 800 DPI | Orange |
| Stage #3 – 1200 DPI | Yellow |
| Stage #4 – 1600 DPI | Green |
| Stage #5 – 3200 DPI | Blue |
COPYRIGHT/LEGAL INFORMATION
© 2024-2025 CORSAIR MEMORY, Inc. All rights reserved. CORSAIR and the sails logo are registered trademarks of CORSAIR in the United States and/or other countries. All other trademarks are the property of their respective owners. Product may vary slightly from those pictured.
RELATED CONTENT